So, you want to build an FPV racing quadcopter?
Depending on your knowledge level, this will be fun, or a bit like a first date – terrifying, yet belly squirming exciting. Who knows what monster could be released into the world! Will it be evil and fight you every step of the way, or hold your hand through its first baby steps, giggling and loving every second.
As per my opening shot, this is an overview of how you should start. I’ve built them all, tiny whoops, to 3, 4 & 5”, from runway fashion model light, to popcorn munching fat. An argument could be made for any of them. Again, this gig isn’t about impartial views, its me giving my opinion on how you should start out.
This is going to be aimed at new builders. The idea here is to simplify the choice of styles and components out there. If you’ve built before and got the bug, you’re not going to listen anyhow are you?
The entirety of this article is based on a fundamental rule that all experienced pilots know, but new ones often don’t –

Pilot skill matters more than what you fly.
Whatever quad you make will only be as good as the person flying it. I could spend £500 making the best quadcopter ever, and be blown away by someone with a cheap setup and more skill. That same pilot could do the same with cheap 2205 motors, vs my expensive bigger, more powerful 2207’s through any route – bar flying high over an empty field. If you want to do that, buy a fixed wing!
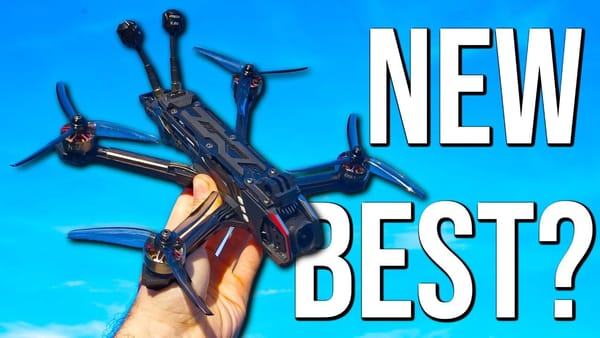
With this in mind, the best fpv quadcopter build to start with for general flying and skill building is a freestyle one. Sure, you have dreams of competing and winning that Dubai race, with its flashing lights and big prize money, but we’re not going there for this one.

Why?
Freestyle quads are heavier. They’re designed for tricks, flips and crashing into trees – a lot. For your first few quads this is what you want. You want interior space while building. You want a couple of battery straps holding the juice to the frame. It’s easier to find your lost quad if the battery remains attached, instead of 90 feet away, hidden in a cowpat. You want space to mount an action cam, of whatever sort you may buy.
Space and ease of building aside, the number one benefit to a heavy freestyle quad is the way they fly. A lot of fun can be had with a light weight racing quadcopter. However, flying an angry wasp that twitches to the beat of your heart won’t improve you’re skills at the same rate and can be daunting. You need to learn throttle control to be a good pilot.
We’re not flying to see how quickly your quad can be a small dot in the sky. We’re approaching this from an angle that will teach you how to fly low and precise, hit gaps, and give you a machine to learn immense tricks on. It’s no surprise the best racers are also great freestyle pilots. Weight helps with all of that. A freestyle quad will zoom around a track, and, at least in the beginning, you’re more likely to make it around one. It will give you a skill set and basis to build on, and set you up for that light weight racer in the right way. When flying, the angle of your fpv camera dictates how quickly you will naturally fly. A heavy quad will fly fast at a lower camera angle. A Super light quad will need a much steeper camera angle to fly at the same speed due to its lack of momentum – otherwise increases in throttle will simply send you skyward rather than forward. A higher camera angle makes it harder to see where the ground is when you’re landing and can make it feel as though you have no option but to fly fast. So, heavy in this case is good. You’ll be able to learn the art of flying low and fast. Pretty much every great freestyle pilot runs a heavy rig.

A great racer will whip an average one regardless of setup.
There are a million frames out there. I’m going to keep it simple, and tell you a few I like from the dozens I’ve played with. We’re going to concentrate on the classic long body 5” frame. Arm geometry is no biggy, so if you want a true x, or a squashed x, or more rarely on freestyle frames a stretched x (usually reserved for racing, where the motors being further forward allows for steadier fast forward flight), then knock yourself out – the differences are minimal in flight, and this hobby is very much about experimenting.
I think the battery should be sat on top of the quad. There are pros and cons to this, but the number one reason I’m suggesting this beyond the general view that they fly better, is because top mounted battery frames usually have two battery straps. If your battery is attached to your quad, and still connected, you’ll generally find it when you crash, by using the homing buzzer, or Dshot esc chimes (more on this in another article). If it isn’t, it’s much harder to track down.
I think you can happily start cheap. Cheap doesn’t have to mean rubbish, but there is always an element of you get what you pay for. The benefit of cheap, is you’re less likely to fly it like it’s your mother’s new car.
Want a top end frame? Arms chamfered in virgin sweat? I’ve got you covered there to.
Cheap frames to consider.
Martian II or Martian Anniversary Edition
It’s a clone of the good old Impulse RC Alien, and thus is a – dum Dum DUUM – Clone! I don’t generally advocate ripping off someone else’s work, but the Alien frame has influenced pretty much every modern quadcopter frame, so I think we can forgive this very old rip off. It has a lot of things going for it too.
Pro’s:
- Super cheap – can often be had for less than £18
- Tons of build space – you could fit another quad inside this one. It doesn’t get easier than this, and that frees you up to use whatever components you wish.
- Replaceable arms, and spares are cheap.
- A lot of fun to tinker with and modify – frame can be modified to a lowrider (see this old playlist of Martians I played with)
- Flies very well.
Con’s:
- Low grade carbon fibre
- Quality varies from batch to batch
- Needs a bit of filing to soften rough cuts, and I’d advise gluing the edges to stop the carbon separating (delaminating) – you can use CA glue (super glue with a longer drying time) or a bottle of cheap superglue and work quickly. Gorilla glue works well, but can leave a brownish stain.
Many very good pilots have a secret Martian, commonly referred to as their ‘Basher’ quad. Something to bring out when you’re attempting something stupid, something that’s likely to end up in tears, a huge climb, or a swim. Opinions will vary to how strong it is, from ‘It broke on its first flight!’ To ‘mines never broken and it’s been shot at by a machine gun and hit with a sledge hammer wielded by Thor…’
So basically like every frame ever released in this hobby… If my experience means a jot, I’ve had a few, and in the flying over grass, through trees etc I do, I’ve never broken more than an arm.
My advice, buy two, or at least one arm, a top and bottom plate (these are also available in thicker carbon than the kit). This is especially true if buying from Banggood where delivery can take weeks.
There are a thousand other cheap ones, so feel free to substitute it for another long bodied top mounted freestyle frame if you wish. Please remember that any frame ‘review’ is pretty pointless in terms of longevity. Experienced guys can spot issues, but no one knows how good a particular length of carbon fibre is until they’ve crashed it numerous times.
Higher quality frames.

Hyperlow CG
This is my personal favourite freestyle frame. It has beautiful carbon, a clever component mounting system that allows you to squeeze more than you usually would into a tricky 15mm build height, and was designed by a man who listens. It’s reasonably priced for what you get too. You can increase the stack height if you wish by using longer standoffs. It comes with an action cam ramp, 3d printed mounts for any camera size (mini or full sized work best, as the 3d printed mount for this size offers huge camera protection).
It’s a peach of a frame, but at slightly over £60 is more than three times the cost of the Martian. Will it fly three times as good? No. Will it last three times as long? Probably, but who really knows? It’s certainly better thought out, but anything will break if you hit it at the right (or wrong..) angle.
Pros:
- Beautiful chamfered woven carbon
- Very pretty
- Low ride height for improved stability
- Clever component mounting system
- Lots of 3D printed bits for whatever camera you use
- Cheap arms
Cons:
- 15mm stack height tricky for a new builder (can be increased)
- Props in view if using a GoPro action camera (Can be solved by adding spacers to the action cam ramp)
Other frames to consider.

- Astrox X5 – (beautiful carbon and survives a lot of abuse)
- Impulse RC Reverb – Good frame with clever ideas to bring the price into ‘reasonable’ territory.
- Armattan Chameleon – lifetime guarantee and because it’s been replaced by the newer Rooster and Chameleon TI, cheaper now.
- Hyperlite Floss Style – cheap if you live in the states. Much thought and testing gone into the design, but more of a race/freestyle hybrid as it’s pretty light weight.
That’s it. There are other styles out there, other decent frames to consider, and other arguments to be made, but the above frames will give you a good entry point into the hobby. They’ll offer you a frame that does what it’s designed to do, well. They offer space for your battery, space for whatever components you wish to use, and will be able to do anything your favourite pilot does.
Next time we’ll start looking at components. How I think you should build your quad, and why. If this article goes against your own thoughts, that’s cool. Do it whatever way you want! That’s the beauty of this hobby, and I love it.
See you next time.
Ross (Coppertop fpv)


