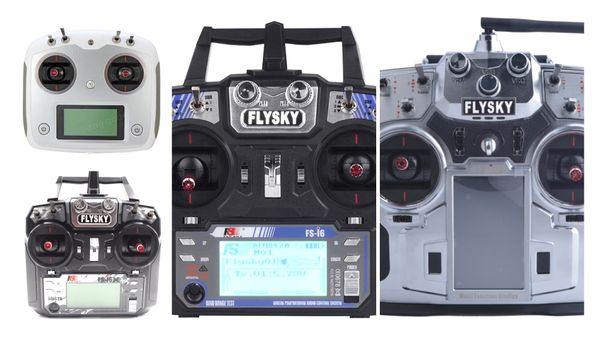
The flysky series radio is an excellent beginner radio as they are cheap and have great features. These are often bundled with ready to fly quadcopters, sometimes they are setup correctly by the seller, but usually the arrive with stock settings. This guide will show you how bind and setup your flysky radio for your FPV quadcopter.
In this guide, I am using the flysky FS-i6 radio with the latest firmware, but all the menus and functionality are the similar across the other flysky radios (FS-i6, FS-i6S, FS-i6X).
1. Setting up a Model
A model is a profile on your radio that you use for each of your aircraft, and saves all the settings specific to that aircraft that you have setup. This is great as it lets you use the same radio controller on multiple aircraft.
- To setup your model, long press the
OKbutton to access the radio main menu. - Navigate to the
System Setupmenu, pressOK.

- Using the
UpandDownbuttons, navigate to theModel selectmenu, in this menu, you can select various models that you have previously saved.

- To select and activate a model you press and hold the
Cancelbutton (counter intuitive I know). - Now we can give our model a name via the
Model namemenu, it’s a bit fiddly but worth naming each model so you know which aircraft each is for.

- Remember to long press the
Cancelbutton to save the name and return to the menu. - Now you need to select the model type, for FPV quadcopters you must select Airplane via the
Type selectmenu. Again remember to long press theCancelbutton to save.

- Later if you want to create a new model you can use the Model copy option to save some time going through all the options.
- The last thing to do is ensure that AFHDS 2A is enabled on your radio, this is usually on by default, but worth double checking.
- Navigate to the
RX Setup > AFHDS 2Amenu, and make sure that it is turned on.

2. Configuring Aux switches
By default, the flysky radios assign Auxillary channels 5 and 6 to the knobs on the radio. Unless you are more than 5 fingers, it is rather difficult to precisely rotate these knobs while flying to change flight modes or other parameters. So we assign the Aux channels to switches on the radio.
- Navigate to the
Functions setupmenu.

- Scroll all the way down to the last option in the menu called
Aux switches.

- By default all of the switches are disabled for some reason, so via this Aux switches menu, you can enable them.

- While you are on this menu you can change the number of channels output by the flysky R/C, but only with supported Ibus receivers.

- Long press the
Cancelbutton to save and return to the menu. - Now navigate to the
Aux. channelsmenu.

- Now you should set channel 5 to
SWC(the three position switch), and channel 6 to eitherSWA, orSWB(a two position switch).

- To save, long press the
Cancelbutton.
3. Binding your Flysky receiver
The process of binding your receiver to your radio essentially just pairs them so that the radio and receiver know that they are talking to each other, useful when flying with others. The basic principle for all flysky receivers is the same, but some specifics might differ from model to model. Some receivers use a bind button, others use a bind plug, so take note for your specific receiver.
- Turn your radio on while holding the bind button, once started the screen should read RX binding.

- Now turn on your receiver while holding in the bund button on that (or with the bind plug inserted depending on your receiver model). Your receiver manual should tell you where this is.

- Once complete you should see the message RXBind OK display for a second.

- Now turn of both the radio and receiver, and turn them both on again. Assuming everything is correct you should see the correct LED display on your receiver, and for receivers that support telemetry you will see an RX bar on the top right of the radio display.

If you find that your RX does not bind, it may be because it does not support AFHDS 2A, so disable that in the RX Setup menu and try again. You also might want to try to enable and disable the PPM output option in the same RX Setup menu. If you are stuck, ask on our forums!
4. Setting the the Failsafe
Having a failsafe is important in case your quadcopter loses signal with the radio, the quadcopter will know and can take appropriate action, instead of just flying away.
- Go to the
System setup > RX Setup > Failsafemenu.

- We only need to enable the failsafe on the throttle channel (or channel 3) so that flight controller will know when it has lost the link with the radio. Scroll to
Channel 3, and press theOKbutton.

- Move the throttle stick all the way to the bottom, and turn the failsafe on.

- Long press the Cancel button to save, and now you should see that Channel 3 is set to -100%. If this is not the case, try again making sure the throttle stick is all the way down and the trim is also all the way down.

- The last thing to do is enable and setup the failsafe on your flight controller, so check your flight controller manual for how to do that.
So that’s how you get your flysky radio properly setup to fly a quadcopter. If you have any questions let me know in the comments below or ask on the dronetrest forums.