
Painless360 walks through converting a SpeedyBee-built 5" freestyle quad from Betaflight to INAV 8.0 and makes a persuasive, slightly smug case for doing so if you care about GPS, return-to-home and not losing your expensive HD kit. This write-up condenses the video into a practical step‑by‑step report, adds a few tips you’ll appreciate, and points to further reading so you can move from curiosity to a confident maiden flight.
Why bother with INAV 8.0 if you already use Betaflight?
If your primary goal is freestyle and raw acro, Betaflight remains brilliant. But, as Painless360 argues, INAV’s GPS and compass handling is in a different league when you want reliable autonomous behaviours:
- Loiter modes that genuinely park the quad in 3D space.
- Mission planning and sensible automatic return‑to‑home (RTH).
- Fail‑safe behaviour that can actually bring your quad back, hover, descend and disarm — even if your radio is toast.
Short version: fit a compass, align it, and INAV will save you grief (and expensive hardware) more reliably than Betaflight’s GPS rescue in many pilots’ experience.
What hardware is used (and why it’s nice)
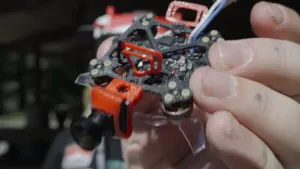
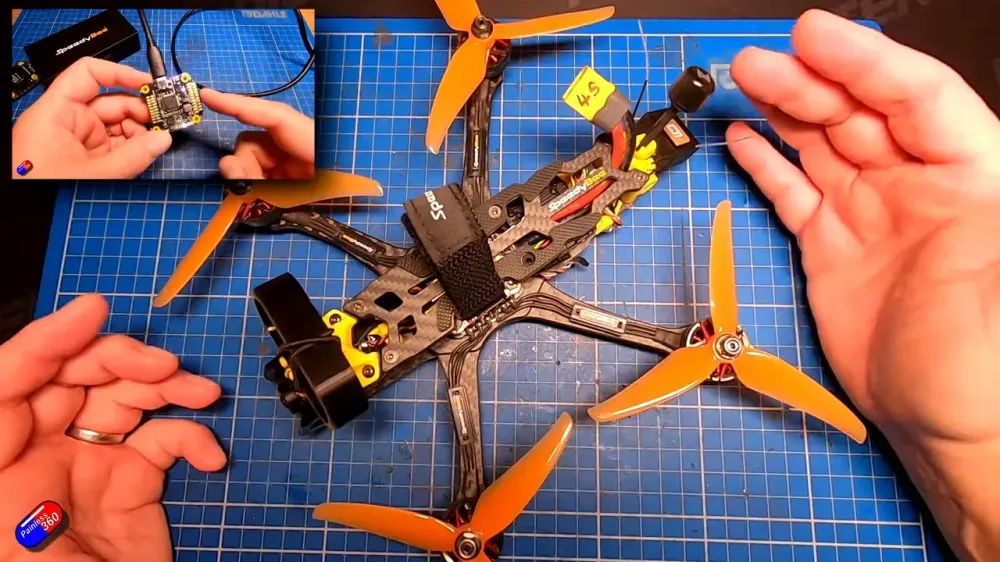
The build shown is a SpeedyBee Master 5 (actually using a SpeedyBee F405 V4 stack with 50A ESCs) and Walksnail HD. Painless360 praises SpeedyBee flight controllers for:
- Clean, obvious wiring and a helpful manual.
- Targets supported in INAV’s firmware flasher for easy upgrades.

Pre-flash checklist — backup first
Don’t be that person who flashes and then remembers a crucial setting. Painless360’s must-do before updating:
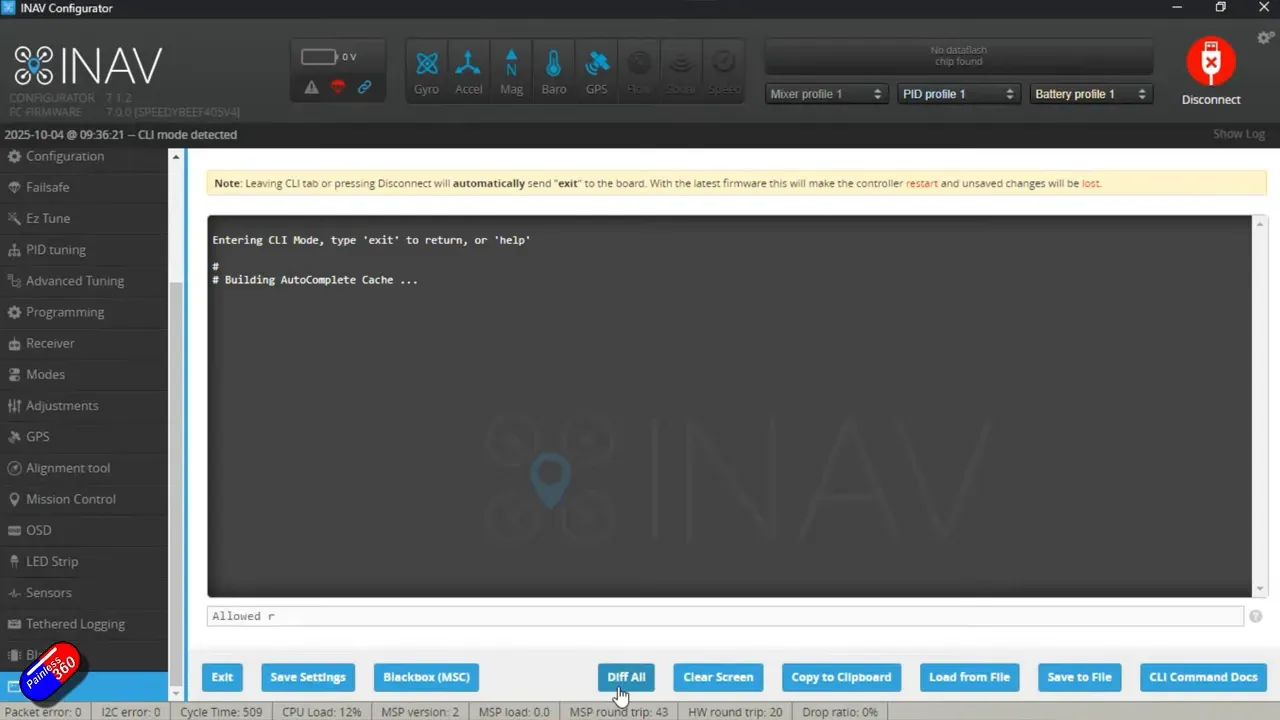
- Connect with INAV Configurator and open the CLI.
- Type clear screen and then diff all — save that output to a file (call it something obvious like inav7_setup_diff_all.txt).
- Also type dump and save that — it’s a full record of configuration settings you can reference or restore.
These two files are your insurance policy when moving from INAV 7.x to 8.x.
Which INAV Configurator version do you need?
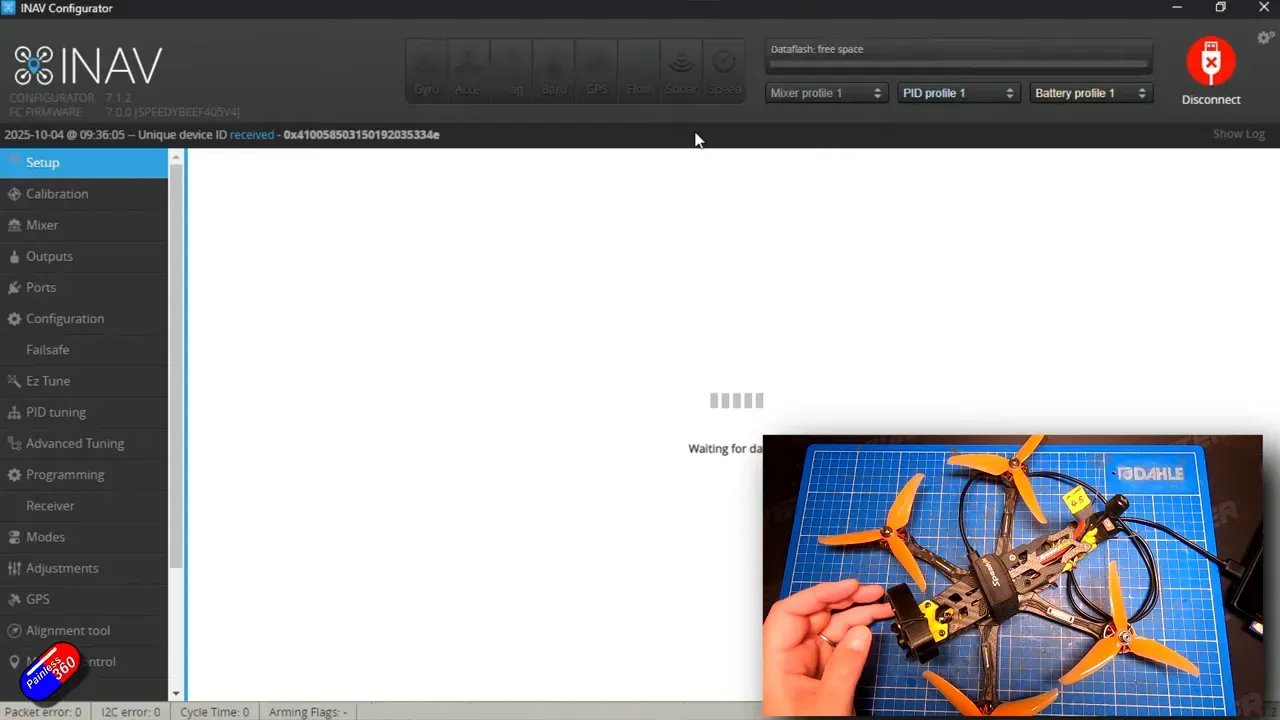
Match the major versions. If your model runs INAV 7.x, use a Configurator compatible with that generation while you prepare — INAV Configurator will typically auto‑detect the flight controller’s "target" during flashing if it has a recent INAV installed.
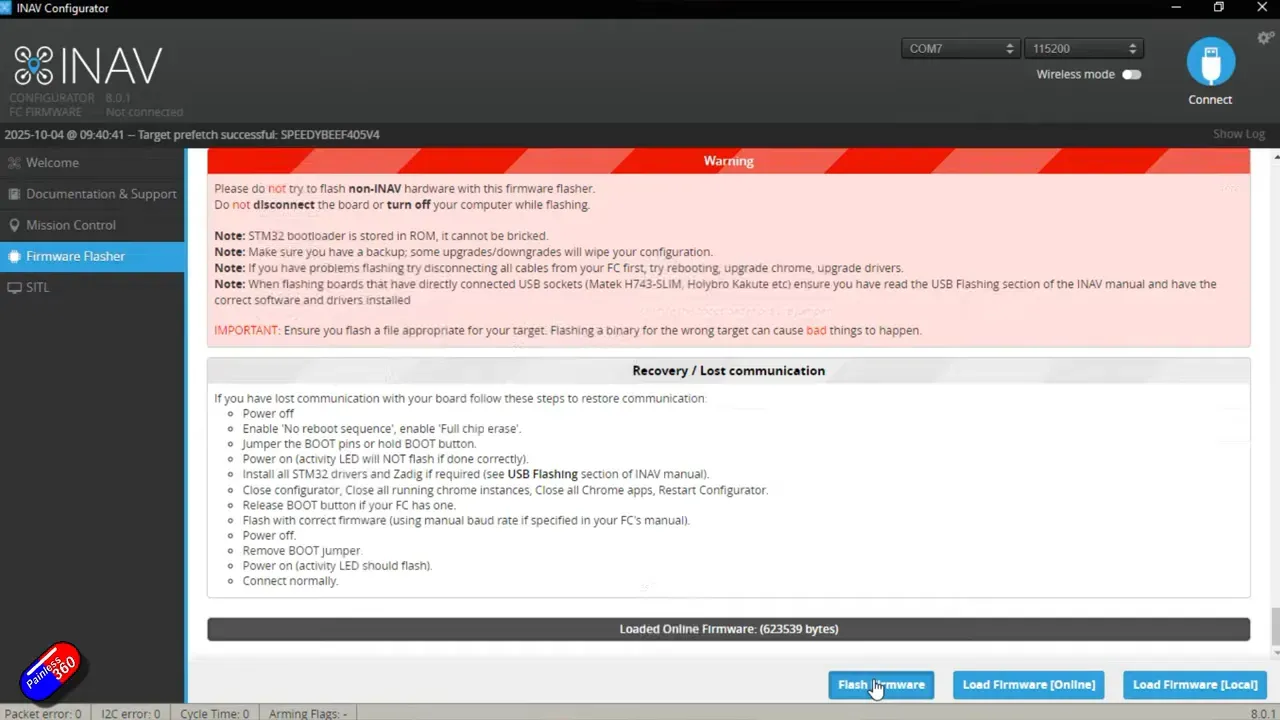
Flashing the firmware (fast and familiar)
Use the Firmware Flasher in INAV Configurator. INAV will usually auto-select the SpeedyBee target for you. Pick the latest INAV 8 build for your target and flash — the process removes the old firmware, uploads the new image and verifies it, just like Betaflight flashing.
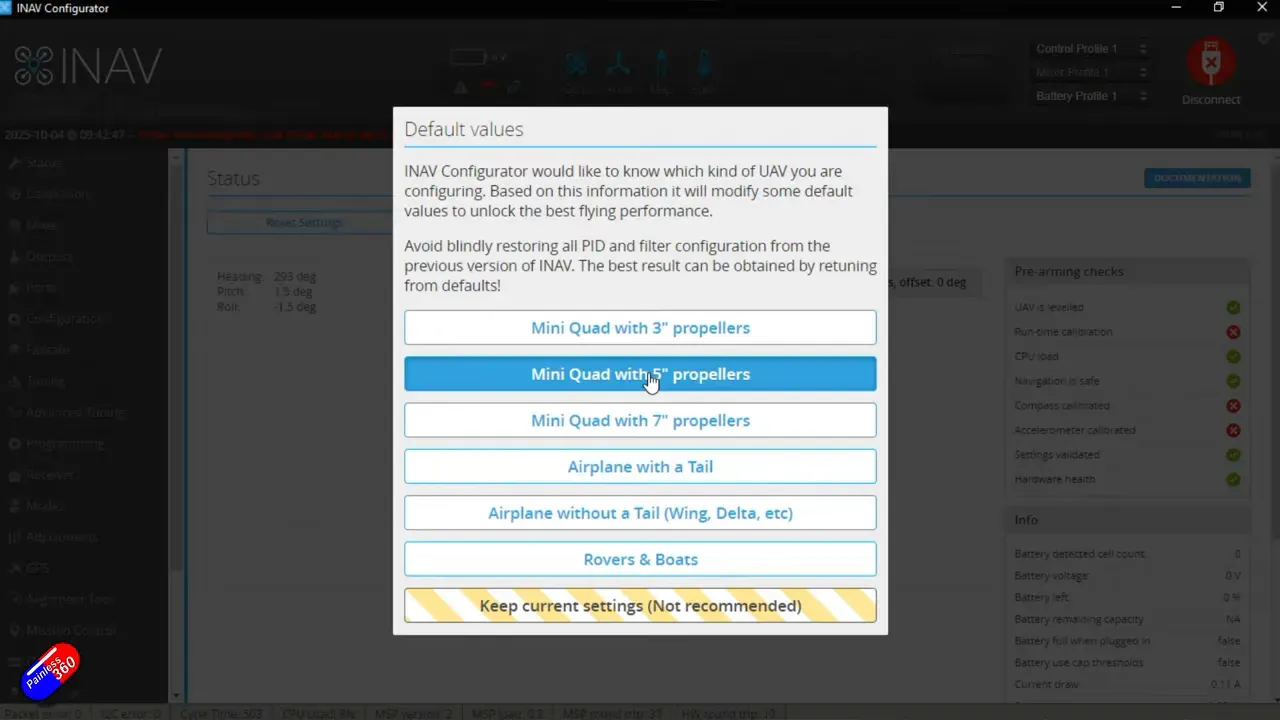
Initial setup after flashing (first connect)
On first connect INAV 8 will prompt for a few basics: aircraft type (quad, 5" props), receiver type and GPS serial port. Answer these and let INAV set sensible defaults — this speeds configuration and reduces mistakes.
Ports, receiver and motors — what to sanity-check
Painless360 recommends verifying these items immediately after flash:
- Ports: confirm which UART is GPS, which is your receiver, and any MSP/DisplayPort for HD systems.
- Receiver: check channel order (AETR) and protocol (SBus in the demo).
- Mixer and motor directions: ensure the mixer is set to quad and motors are not reversed.
- Outputs: remember to enable motor outputs in Outputs — if you forget, motors won’t spin even when armed.

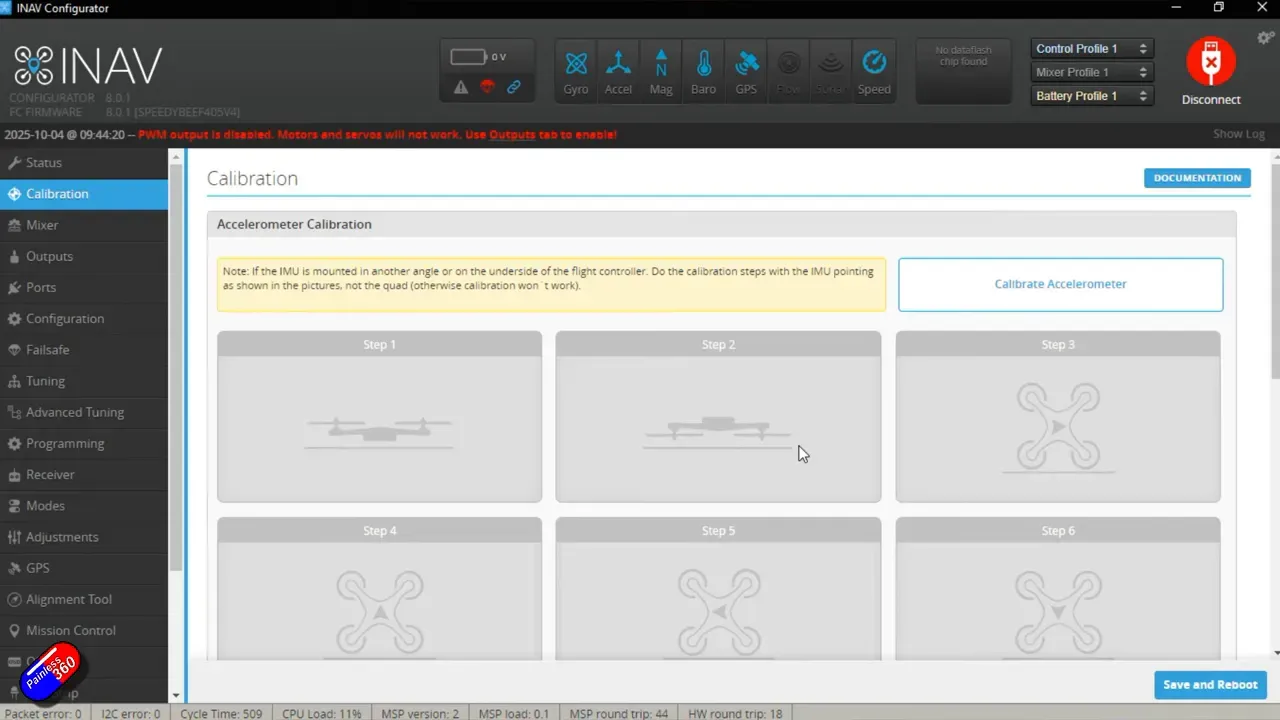
Runtime & sensor calibration — the six‑point love it or hate it
Unlike Betaflight’s simpler accelerometer save, INAV asks you to perform a six‑point accelerometer calibration (level, upside down, left, right, nose up, nose down). Yes it’s a little more faff, but it tells the flight controller what all orientations look like — useful for navigation and autonomous behaviours.
- Go to Calibration → Calibrate → follow the six positions, keeping the quad still at each step.
- If the routine times out or reports inconsistencies, repeat until it completes successfully.
- Save and reboot when calibration finishes.
GPS, compass and alignment — the secret sauce for reliable RTH
Key points from the video:
- Enable all satellite constellations in GPS settings for best performance.
- If your magnetometer (compass) is mounted at an angle (common on HD stacks and antenna pods), use the Alignment Tool to set the correct orientation offset. Painless360 has a separate detailed video on alignment (link below).
- After alignment, run the compass calibration: rotate the quad through all axes until the calibration completes.
- INAV shows useful diagnostics like total messages and error/timeouts for UART→GPS activity; check these to confirm communications are working.
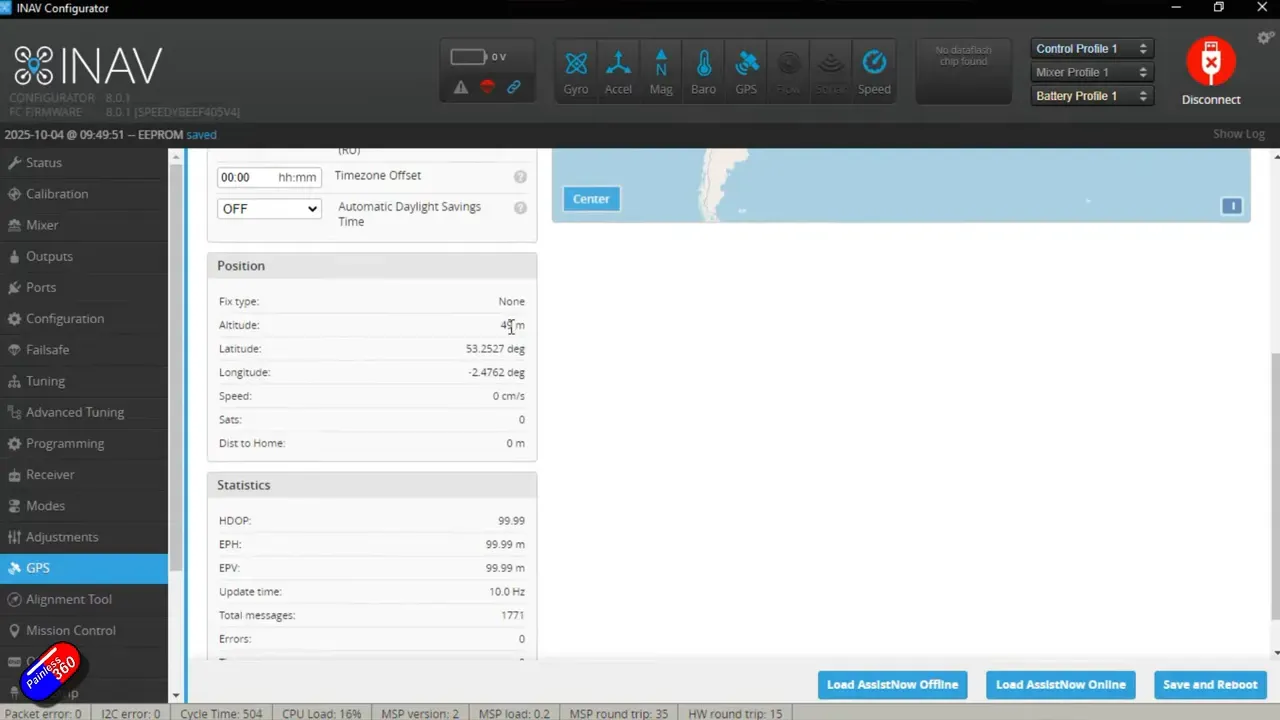
Until GPS and compass are happy (green), INAV will throw pre‑arm safeties and the quad won’t arm. Don’t disable those safeties — fix the underlying calibration/alignment instead.
Modes, failsafe and OSD — essential cockpit configuration
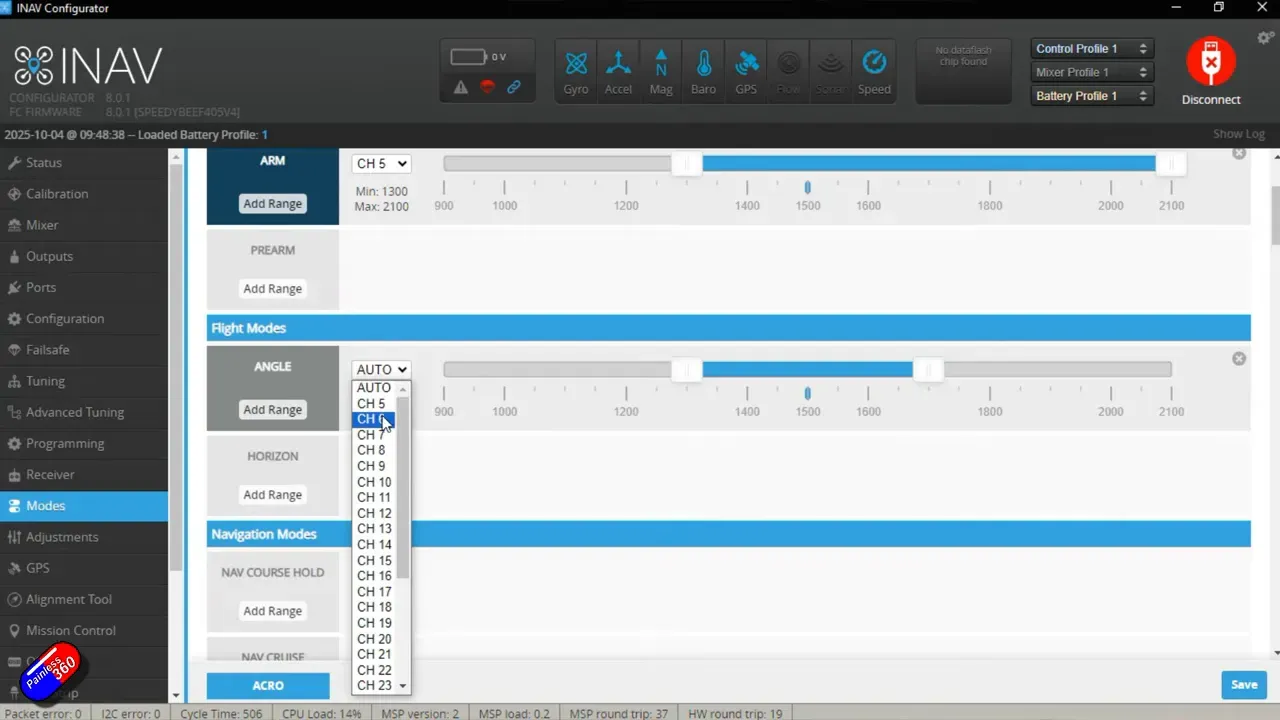
Painless360’s practical mode setup:
- Channel 5 = Arm (works with ExpressLRS/S.Bus).
- Channel 6 = flight mode: Low = Angle (self-level), Mid = Horizon, Top = Acro (no stabilization).
- Channel 7 = Nav / Return‑to‑Home toggle (useful if you need to force RTH manually).
- Channel 8 = Beeper (momentary).
Set failsafe to Return‑to‑Home — that’s the reason many pilots choose INAV for camera‑carrying quads. Telemetry with INAV LewisGrip (compatible with radios that support telemetry) can read battery remaining and other flight stats back to your radio.
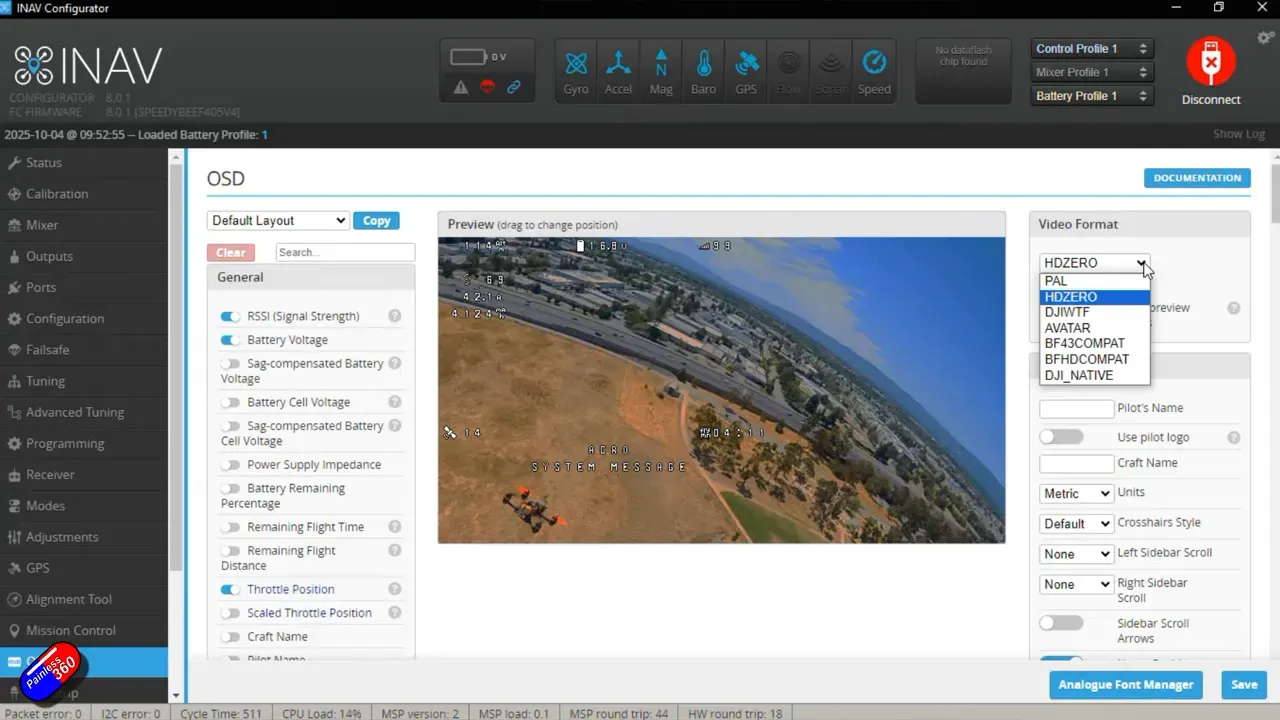
On‑Screen Display (OSD) and HD FPV modes
INAV supports a variety of OSD modes. Painless360 switches to Avatar for Walksnail systems and arranges HUD elements using the preview guides. Notes:
- For Walksnail/Avatar, keep HUD stats under the purple guide area to avoid recording icons overlay.
- If analogue OSD looks like gobbledygook, use the Analog Font Manager to upload the proper fonts to the FC (INAV stores fonts on the controller for analog outputs).
Tuning and hover throttle — set this before autonomous tests
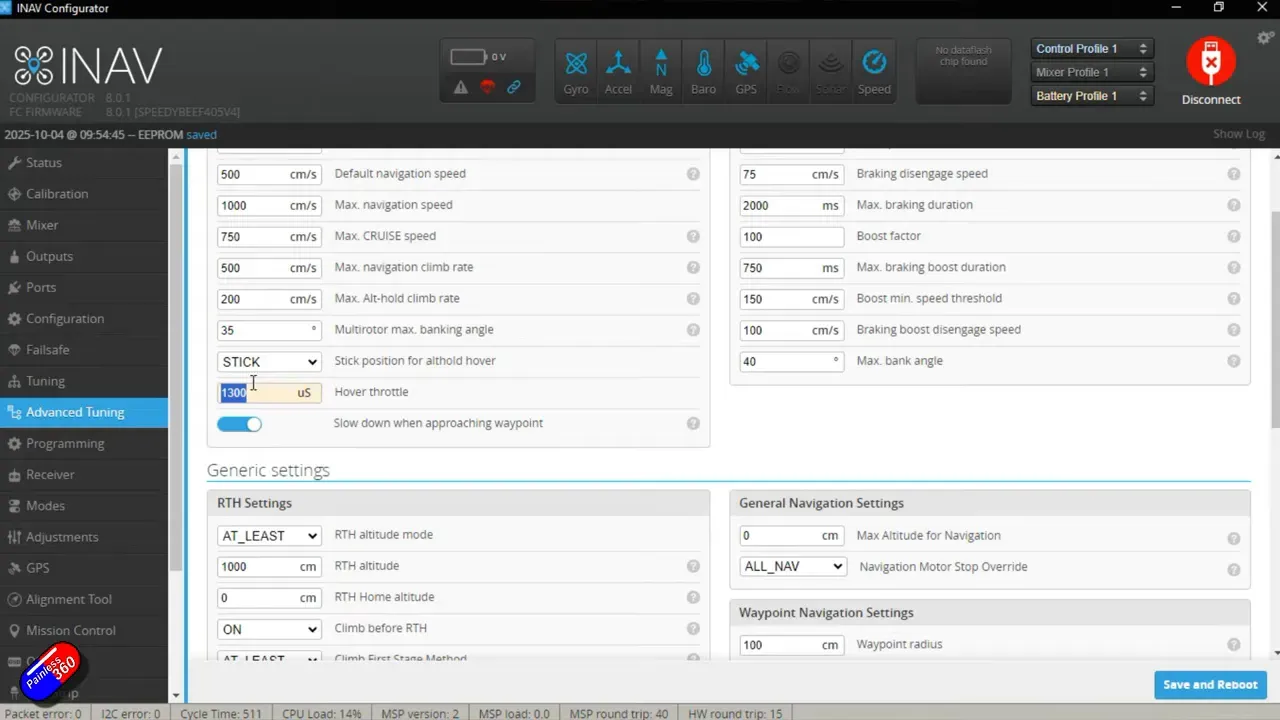
Under Advanced Tuning → Multi‑rotor navigation you’ll find navigation speeds, approach behaviours and hover throttle. Important practical tips:
- Find your hover throttle (the throttle value that maintains a stable hover) and enter it into INAV’s Hover Throttle. Painless360 suggests 1300 as a conservative starting point for many quads, but measure on your rig.
- If altitude‑hold shoots the quad up, hover throttle is set too high. If it sinks alarmingly before correcting, it’s too low. Tweak accordingly.
Critical analysis — what to watch out for
INAV is not Betaflight with a GPS slapped on. It’s a navigation‑first firmware with extra requirements:
- Compass alignment and calibration are non‑negotiable for robust RTH and loiter modes.
- INAV’s pre‑arm safeties can be frustrating but are protective — they force you to fix sensor issues before flight.
- Moving from Betaflight accelerometer diffs to INAV means you’ll likely need to re‑calibrate the six‑point routine; don’t skip it.
Painless360’s approach is pragmatic: backup, flash, set UARTs and receiver, calibrate EVERYTHING, configure modes and OSD, then run autonomous tests with conservative settings.
Step-by-step quick checklist (do this after flashing)
- Backup CLI: diff all → save; dump → save.
- Confirm UART assignments (receiver, GPS, MSP/DisplayPort for HD).
- Run six‑point accelerometer calibration and save/reboot.
- Enable outputs so motors will spin when armed (but keep props off for bench tests).
- Set receiver channel order and verify endpoints and midpoints (1500).
- Configure Modes: Arm, Flight modes, RTH, Beeper on your chosen channels.
- GPS: enable all constellations, check message counts, wait for lock outdoors.
- Alignment: measure magnetometer offset (alignment tool) → compass calibration.
- OSD: choose Avatar for Walksnail/HD, arrange HUD, upload analog fonts if needed.
- Measure hover throttle and enter conservative value into Advanced Tuning → Hover Throttle.
Do I need a compass for INAV to return home reliably?
Technically no — INAV can work without a compass by estimating heading from motion like Betaflight. Practically, for reliable RTH, loiter and mission behaviour you should fit and align a compass. It gives the flight controller an absolute heading reference that is far more robust in windy or GPS‑noisy conditions.
Can I reuse my Betaflight diff or dump file when switching to INAV?
No. Betaflight diffs/dumps are not compatible with INAV. Always export INAV’s diff/dump after flashing and configuration changes. Before upgrading INAV versions, save your INAV diff/dump so you can restore settings or reference them later.
What is the recommended failsafe behaviour?
Set failsafe to Return‑to‑Home. That’s the main reason many pilots choose INAV for rigs with expensive cameras or HD transmitters — it’s more likely to bring your quad back safely if control or telemetry is lost.
How do I pick the right hover throttle value?
Hover the quad in a safe test area and note the throttle channel value that maintains stable, level hover. Use a conservative starting value (Painless360 suggests ~1300) and adjust: if altitude hold rockets the craft, the value is too high; if it sinks before recovery, it’s too low.
Final thoughts — Painless360’s verdict and my take
Painless360 demonstrates INAV 8.0 as a practical, sometimes indulgent upgrade for pilots who want the GPS/compass features to actually work — not just exist. If you’ve been flitting between Betaflight and the dream of autonomous flights or worry about losing expensive Walksnail/HD gear, put in the few extra minutes of calibration and alignment and enjoy more reliable RTH and loiter behaviours.
If you want the granular visual walkthrough, watch Painless360’s original video linked above; it’s the best way to see the CLI commands and OSD screens live. Then come back here, follow the checklist and get airborne—safely.
This article was created from the video Step by Step INAV 8.0 Quad Setup for Betaflight Pilots - EASY.