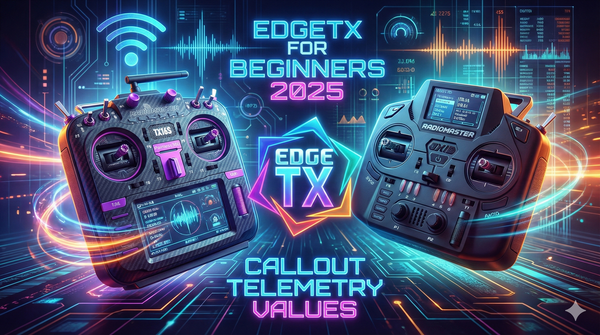
Getting comfortable with your radio transmitter is a game-changer in the RC hobby, especially when you're stepping into the world of EdgeTX-powered radios like the Radiomaster TX16S. In a recent video by Painless360, he breaks down one of the fundamental yet powerful features of these radios — adding a switch to control a channel or output on your model. If you’re transitioning from brands like FreeSky, Futaba, or Spectrum, or if you’re fresh into the hobby, this guide is tailored just for you.
Why Bother Adding a Switch?
EdgeTX radios, including the TX16S, come packed with an array of controls — switches, rotary knobs, trims — all waiting to be assigned to various functions on your model. Adding a switch is not just about toggling something on or off; it’s about unlocking creative control.
- Turn lights on and off
- Drop landing gear or tracks
- Activate flaps or other flight surfaces
- Arm or disarm your model
And the best part? Adding a switch to an already existing model setup is surprisingly simple.
Step-by-Step: Adding a Switch to Your Model
Painless360 starts with a basic setup — a model configured with just the essentials: aileron, elevator, throttle, and rudder. Here’s how he adds a switch to channel 5, which you might want to use for arming or any other function.
Confirm and Save: Hit enter to confirm the source, and voilà, your switch is linked to channel 5.
Select the Source Control: Here’s the clever bit — you can scroll through all available inputs like sticks, gimbals, trims, and switches. Painless360’s trick: just toggle the physical switch you want to assign, and the radio auto-selects it.
Name Your Channel: Naming it something memorable like "Arming" helps when you revisit your setup later.
Choose the Channel Number: For this demo, channel 5 is selected.
Add a New Channel: Tap the plus key at the bottom of the screen to add a new channel.
Head to the Mixer Tab: Although there are multiple places to add controls, the mixer tab is the recommended spot. This is where you manage channel outputs.
Open the Model Setup: Press the model key briefly to bring up the configuration menu.
Notice how the position of the physical switch and the channel output move in perfect sync — the yellow and blue bars on screen reflect this lock-step movement, ensuring your settings are spot on.
Seeing Your Switch Action Live
Want to keep an eye on your new switch while flying? You can add an output widget on your telemetry screen:
- Go into the telemetry screen
- Set up widgets and choose “Outputs”
- Fill the background for better visibility
Now you can watch channel 5’s output alongside your main controls — a quick visual confirmation that your switch is doing its job.
Fine-Tuning and Limits
Sometimes a switch might send too wide a signal range — for example, if you’re controlling flaps and want to limit their travel. EdgeTX lets you easily set limits and apply dual rates or travel adjustments. Painless360 recommends checking his other videos for a deep dive into travel limit settings and dual rates, but the takeaway is clear: flexibility is built right in.
Why This Matters for Beginners and Beyond
EdgeTX radios like the TX16S are powerful, but can feel overwhelming when you’re starting out. This video by Painless360 demystifies a core task, showing that adding a switch control is not just doable, but straightforward. By mastering this, you gain the ability to customize your flying experience — making your models smarter, safer, and more fun to fly.
For those hungry to dive deeper, Painless360’s channel hosts a full EdgeTX for Beginners 2025 series, alongside advanced tutorials that explore everything from mixing to telemetry widgets.
Additional Resources for RC Hobbyists
Want to expand your knowledge beyond radio setup? Check out these related resources from Unmanned Tech Shop:
- Jumpers New T20 Radio Transmitter Review — for insights on the latest radios in the market.
- FPV Pilots and Camera Integration — enhancing your flying with better visuals.
- Drone Motor Protection Techniques — keep your motors safe while pushing limits.
FAQs
Q: Can I assign any switch or control to any channel on my EdgeTX radio?
A: Yes, the system is very flexible. You can assign switches, trims, sticks, or rotary controls to any channel in the mixer tab.
Q: What happens if I forget to name my new channel?
A: Your setup will still work, but naming channels helps you remember their function when you revisit your model later — highly recommended.
Q: Can I limit the range of the switch output?
A: Absolutely. EdgeTX supports travel limits and dual rates, allowing you to fine-tune the output range of any control.
Q: Is this process different for other radios or firmware?
A: The specifics can vary, but the concept of assigning physical controls to channels is common across many radios. This video focuses on EdgeTX-powered radios like the TX16S.
Q: Where can I learn more about mixing and advanced radio setups?
A: Painless360’s YouTube channel has comprehensive playlists on mixing and advanced EdgeTX/OpenTX features. Start with the EdgeTX for Beginners 2025 series.
Wrapping Up
Painless360’s tutorial is a must-watch for anyone new to EdgeTX radios or looking to get more out of their transmitter. Adding a switch might sound basic, but it’s a fundamental skill that opens the door to more complex and custom setups. It’s quick, intuitive, and once you’ve done it, you’ll wonder why you ever hesitated.
Ready to take control? Watch the full video, subscribe to Painless360 for more hands-on tutorials, and start customizing your models like a seasoned pilot. Happy flying!
This article was created from the video Adding a switch to a channel/output (EdgeTX for Beginners 2025).