Today, we’re diving deep into the world of DIY battery building with Joshua Bardwell, who’s about to embark on the electrifying adventure of constructing an 18650 lithium-ion battery pack. Spoiler alert: it’s not going to be perfect, but that’s part of the fun!
Joshua kicks things off by admitting his lack of expertise in battery building, but he’s ready to tackle the task head-on. The first step? Understanding the specifications needed for the battery pack.
Designing the pack: voltage, mAh, and C rating
Three key specifications are essential for designing the battery pack:
- Voltage: Determines what the pack needs to output based on the devices it will power.
- Capacity (mAh): Indicates how long the battery will run.
- C rating: Relates to the current the pack can safely deliver.
Voltage
The voltage required depends on the appliances being powered. For FPV goggles and other electronics, Joshua decides on a 4S configuration (four cells in series), which provides a comfortable voltage range.
Capacity (mAh)
Joshua explains that the capacity increases with parallel groups. Opting for a 4S2P configuration (four in series, two in parallel) gives him a total capacity of 6000mAh, which is just right for his needs.
18650 vs. 21700
Next, he compares the 18650 cells to the larger 21700 cells. While the 21700 cells offer more capacity, Joshua chooses the 18650 cells for their compactness, as he’s looking for a battery that fits comfortably in his pocket.
C rating
For this build, he selects Samsung 50S 21700 cells, boasting a 5000mAh capacity and a 25A discharge rating. This is more than sufficient for his low-power needs.
How many cells do I need?
To achieve the desired configuration, he calculates that he needs a total of eight cells for the 4S2P setup he has chosen.

How to line up the cells for S and P rating
Joshua discusses the layout of the cells, explaining how to connect them in series and parallel effectively. He emphasizes that the arrangement is flexible as long as the connections are made correctly.
S-group first or P-group first?
He advises that it’s generally better to build the parallel groups first before connecting them in series, ensuring a more stable battery pack.
Matching internal resistance
While it's important to match internal resistance for optimal performance, Joshua decides not to worry too much about it for this build since he’s using new cells.
Superglue the cells together
To secure the cells, Joshua opts for superglue, explaining that it’s a reliable method. He uses a 3D-printed jig to hold the cells in place while the glue dries.

Nickel strips
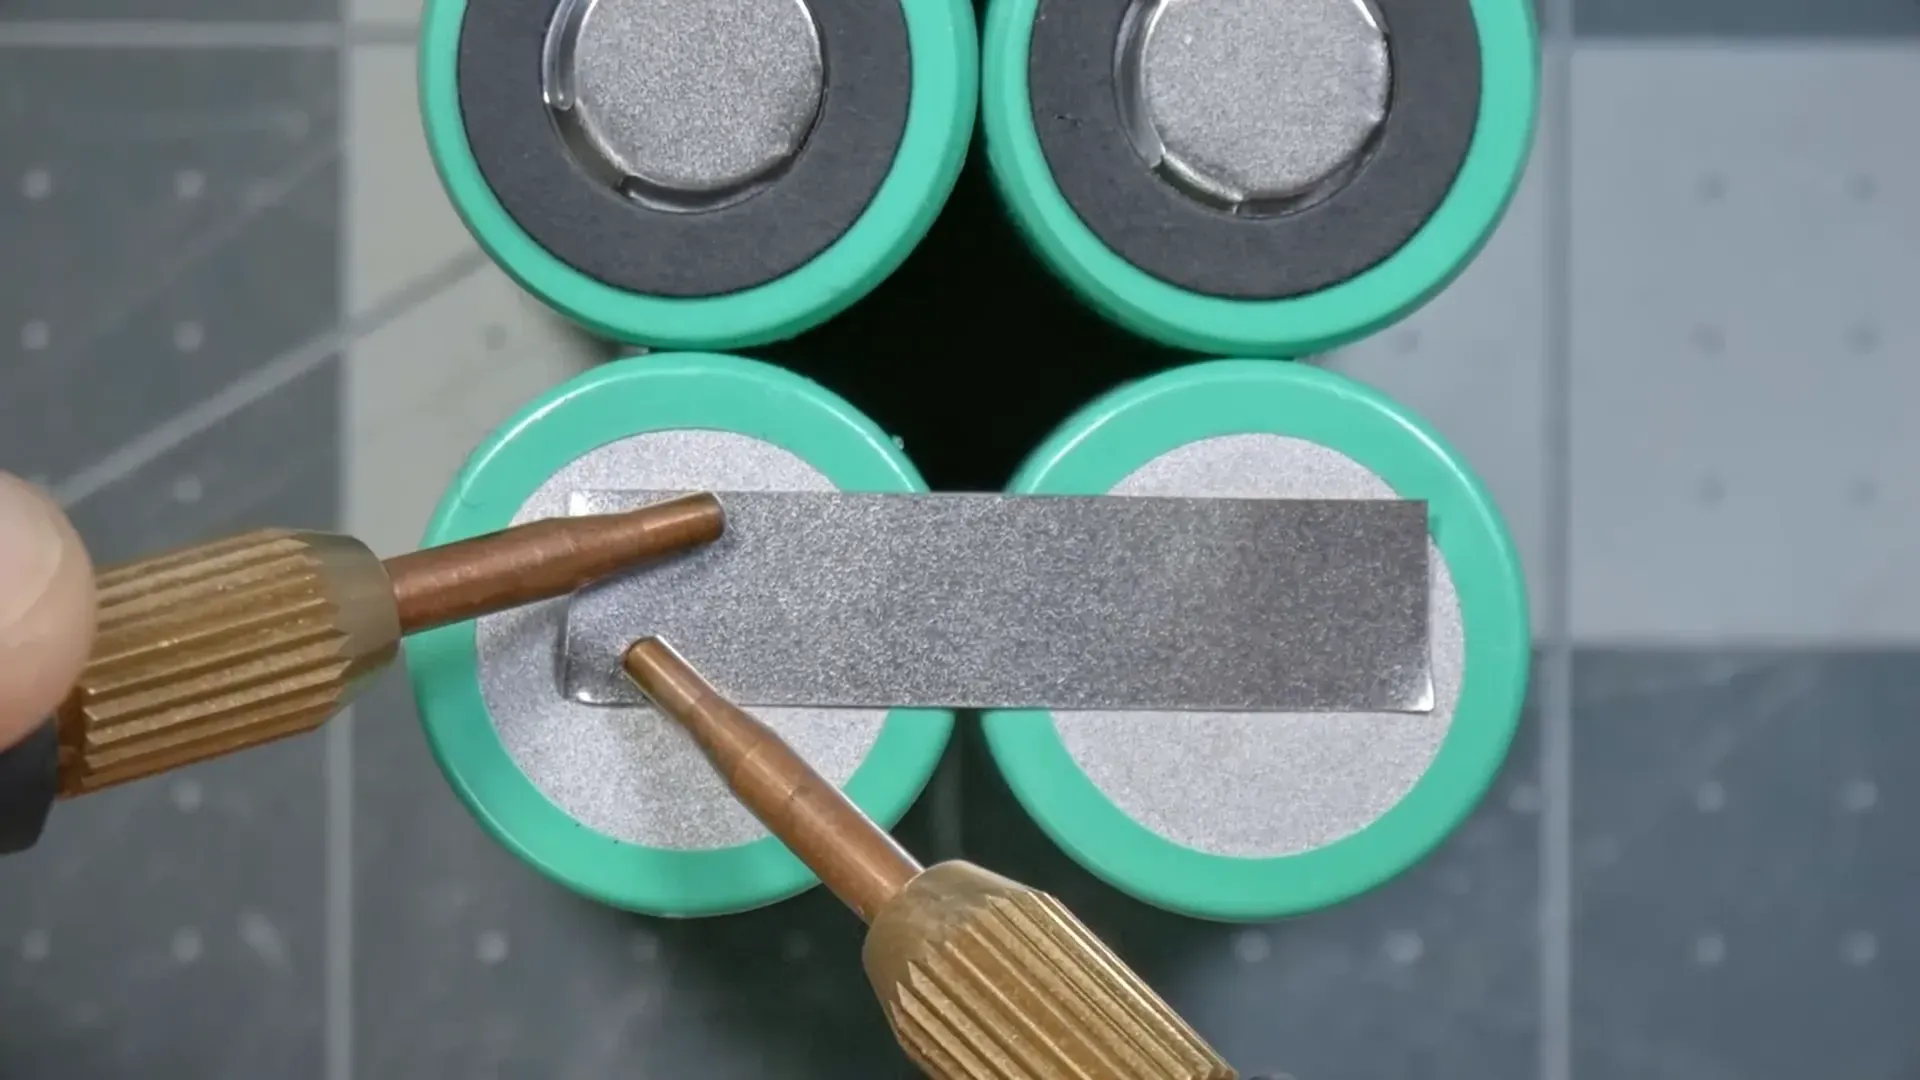
Next, he introduces nickel strips which will be used for connecting the cells. He notes that these strips are easier to spot weld than traditional wiring.

Use ceramic-tipped scissors and tweezers
Joshua emphasizes the importance of using ceramic tools to avoid causing short circuits while working with batteries.
Fish paper
He uses fish paper to protect the cells from abrasion that could lead to short circuits, applying it to the positive terminals for extra safety.

Spot welder
Joshua demonstrates the use of a spot welder, explaining its importance in minimizing heat damage to the cells during assembly.

Spot weld the parallel groups
He proceeds to weld the parallel groups together, showing how to ensure strong connections by using proper techniques.

Map out the series wiring
Next, he maps out the series wiring, ensuring that he connects the cells correctly to maintain the desired voltage and capacity.

Spot weld the series groups
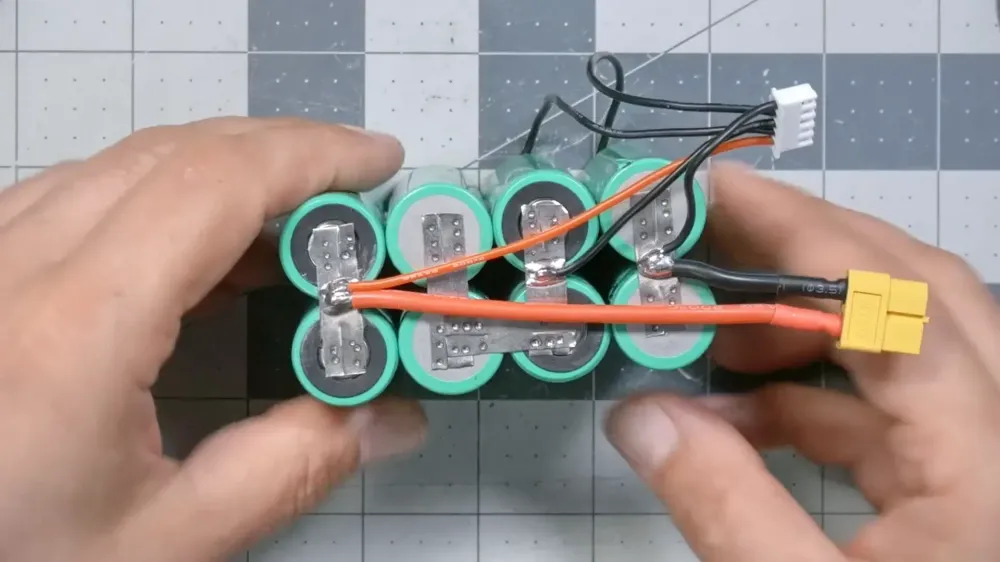
Joshua then spot welds the series connections, ensuring everything is secure and ready for the final touches.

Check your work
After assembling the pack, he checks the voltage to ensure that everything is functioning correctly. A multimeter confirms that he has achieved the expected voltage.

Solder the XT60 lead to the battery
Joshua carefully solders the XT60 lead to the battery, taking precautions to minimize heat exposure to the cells.

Plan and solder the balance lead
He explains how to attach the balance lead, ensuring that each connection is made correctly to allow for easy charging and monitoring.

Final assembly
Wrapping up, he insulates the pack with Kapton tape and fabric wire harness tape for added protection against abrasion.

Conclusion
Joshua reflects on the process, acknowledging the challenges and triumphs of building his own battery pack. He invites viewers to share their feedback and experiences in the comments.

FAQ
- What is the lifespan of an 18650 battery?
The lifespan typically ranges from 2 to 5 years or around 300 to 500 charge cycles. - Is there a substitute for an 18650 battery?
Depending on the device’s specifications, batteries like 21700 or 20700 could be substitutes. - How can you tell a fake 18650 battery?
Look for discrepancies in labels, packaging, or performance; these can indicate counterfeits. - Will an AA battery work for an 18650?
No, AA batteries are generally unsuitable due to size, voltage, and capacity differences.
For more insights and guides on battery building and drones, check out these related posts:
- Prebuild vs DIY Build: Making the Right Choice
- How to Solder FPV Drones: A Comprehensive Guide
- Soaring and Spying: A Tale of UAV Innovations
For a deeper dive into battery technology and DIY projects, make sure to follow Joshua Bardwell on his YouTube channel.


