Maybe you have spent hours on your FPV quadcopter build, everything is configured, your receiver and motors are working, flight modes are setup. But as soon as you plug in your battery you cant fly as your quadcopter is just not arming. Most of the time it is not a fault on your quadcopter, but just a built-in safety feature that is getting in the way. In this guide, you will learn how to solve issue why betaflight won’t arm.
Before we get started, an easy tip to know if your quadcopter is not arming due to the pre-arm safety checks, you can look at your flight controller when you try to arm. If a pre-arm check is preventing arming, then you will see the red LED pulsing slowly.
Check your Receiver
Perhaps the most obvious but also most common problem for your quad not arming is due to your receiver not being setup correctly. If your receiver is not working, how will your flight controller receive any commands to tell it to arm?
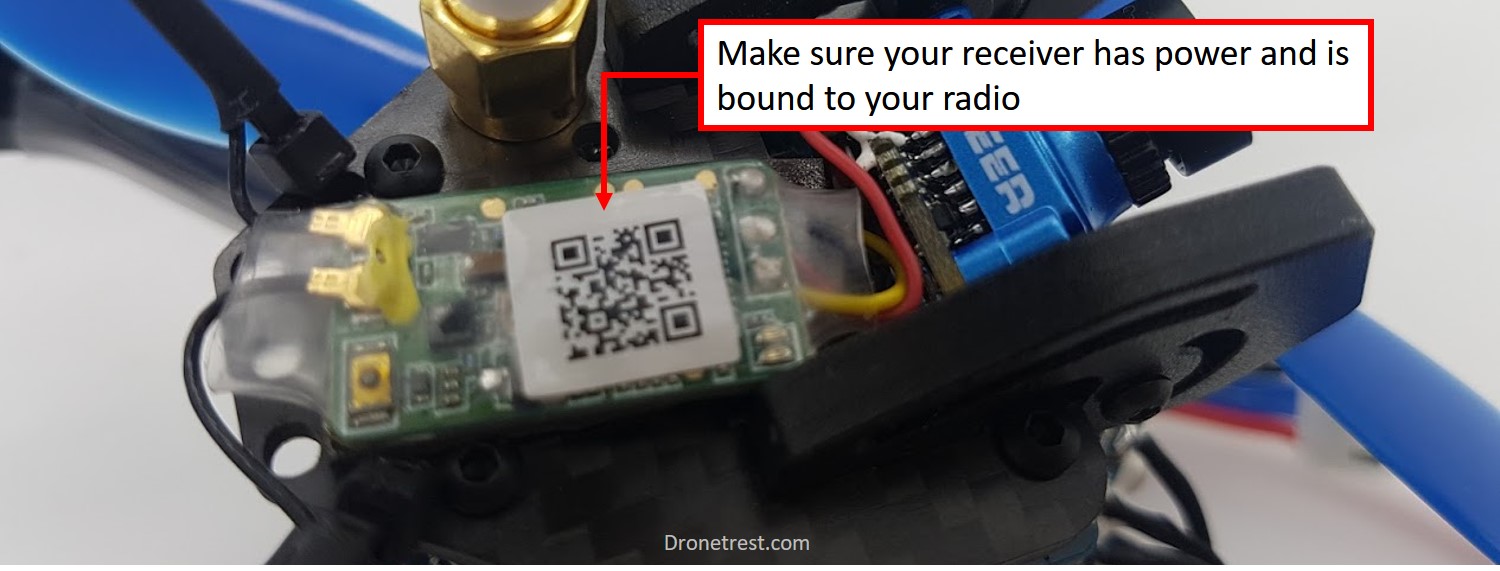
An easy way to check this is with your quad connected to betaflight GUI you can go to the receiver tab, with your receiver and radio powered on you should see the bars moving when you move the sticks on your radio. If not, you need to properly connect, setup and bind your receiver. Consult your manual on how to do this. Here we are assuming that your receiver is connected correctly to your flight controller and that it is bound to your radio but your quad is still not arming, so these are some other things to check.
Check your receiver channel mapping
When you need to make sure that each control on your radio is correctly mapped onto your flight controller. So when you move your throttle stick to the max position, your flight controller detects this correctly. This is done on the receiver tab in betaflight.

Here you need to ensure that when you move a stick on your radio (let’s say the pitch stick), the corresponding bar on betaflight should move. If not you need to adjust the channel map as shown in this video:
Check minimum throttle value (min_check)
The next thing to check is your minimum throttle value. Betaflight will not arm your quad if your throttle is too high as the motors could suddenly spin up and cause some serious damage to your fingers. So betaflight checks if your throttle is below the value saved in the min_check parameter. By default, this is 1050. So in the receiver tab with your throttle stick all the way down, you must ensure the value reported there is less than the min_check value (1050). Sometimes with new firmware updates or different boards, it can be different, I have seen the min_check value be as low as 1000, so this is something worth checking.

Go to the CLI and type get min_check to see what the value is. If it is too low or high you can change it by typing the command set min_check 1050.
However, in general, it is a good idea to calibrate your radio endpoints so that every channel is between 1000 and 2000. I have made a video on how to do that here.
Check your Accelerometer Calibration
Betaflight has a built-in safety check that will not let you arm if your quadcopter is not approximately level. So you cant arm your quad accidentally while carrying it, or it’s not on a relatively level surface. However, if your quad is on a level surface maybe it might not think so if the accelerometer sensor has not been correctly calibrated.
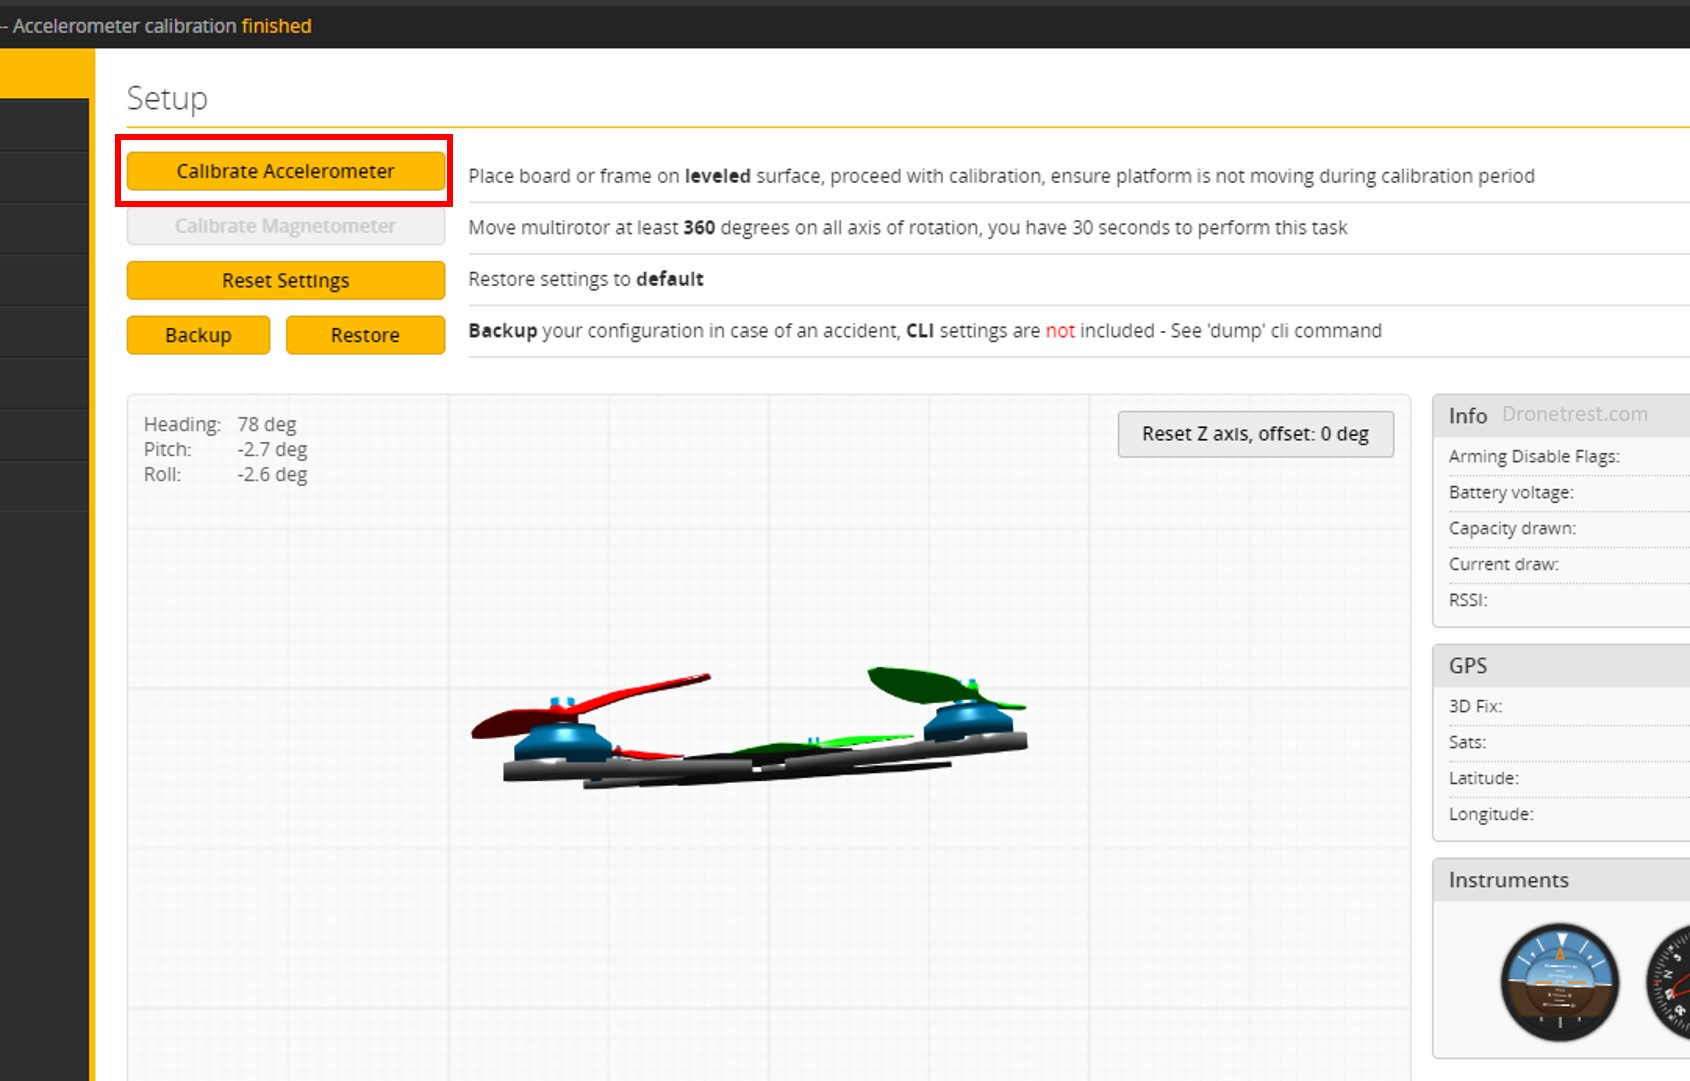
This is easy to check by connecting it up to beflight GUI, and on the main screen, you can see what data the accelerometer is outputting through a nice 3d model of a quadcopter. If your quadcopter is level and the model does not show this, then chances are this is why you cant arm your drone.
To calibrate the accelerometer :
- Make sure you place your drone on a level surface,.
- Press the calibrate accelerometer button.
- After a few seconds it will complete and the model shown now be level.
If the angle is out by a few degrees dont worry.
Most pilots run the accelerometer calibration during their initial configuration. However, from time to time a bad bump or hard crash can knock the calibration out a little so you might need to do this again. If you are on the field and cant access your computer you can use a stick command to calibrate the accelerometer.
To do an in-field calibration:
- Make sure your quad is on a level surface
- For a mode 2 radio, move the throttle stick to the top left (full throttle, full yaw) and the pitch stick all the way down, as per this diagram:
![]()
- After a second or two you will hear a beep (if you have a buzzer installed) or the LED’s will flash briefly on your flight controller.
If this check just annoys you and you don’t care about your fingers, you can disable the accelerometer under the configuration tab, then this pre-arm check no longer applies. But I am against doing this as you are disabling a safety feature.

🐝Bonus: You can change the “small_angle” parameter in the betaflight CLI, as this is the angle range your accelerometer needs to be within for betaflight to allow arminig.

Check your Flight Modes
If you are using switch arming you need to check that is it working correctly within betaflight. I recommend that you do use switch arming as it is abit faster to arm, but more importantly you can very quickly disarm your quad if something goes wrong.

In the modes tab of the GUI, you can setup a spare channel to use for arming. You should set this to be a 2 position switch. Once you have set this you should save and double check your quad is armed by moving the switch and if it is working, the box will turn yellow to show that it is active and armed. If not check that the range bar is within the range of the little indicator bar that shows the switch position.
This same process is good to go through for all the other flight modes you wish to use to make sure that when you flick a switch it is activating the correct mode. You don’t want to be flying only to find out the acro mode switch accidentally disarms your quad mid-flight, causing it to fall out the sky as the motors will shut down!
Check your CPU Load
If your CPU on your flight controller is overloaded betaflight will prevent your quad from arming as it is not safe to fly on an overloaded CPU since it might not be able to do all the calculations in time. To check this, you can easily see the CPU load along the bottom bar in the betaflight GUI.

How to reduce CPU load in BetaFlight
The first thing to do would be to disable some unused, or non critical features on your flight controller. The place to do that is in the configuration tab, other features box.
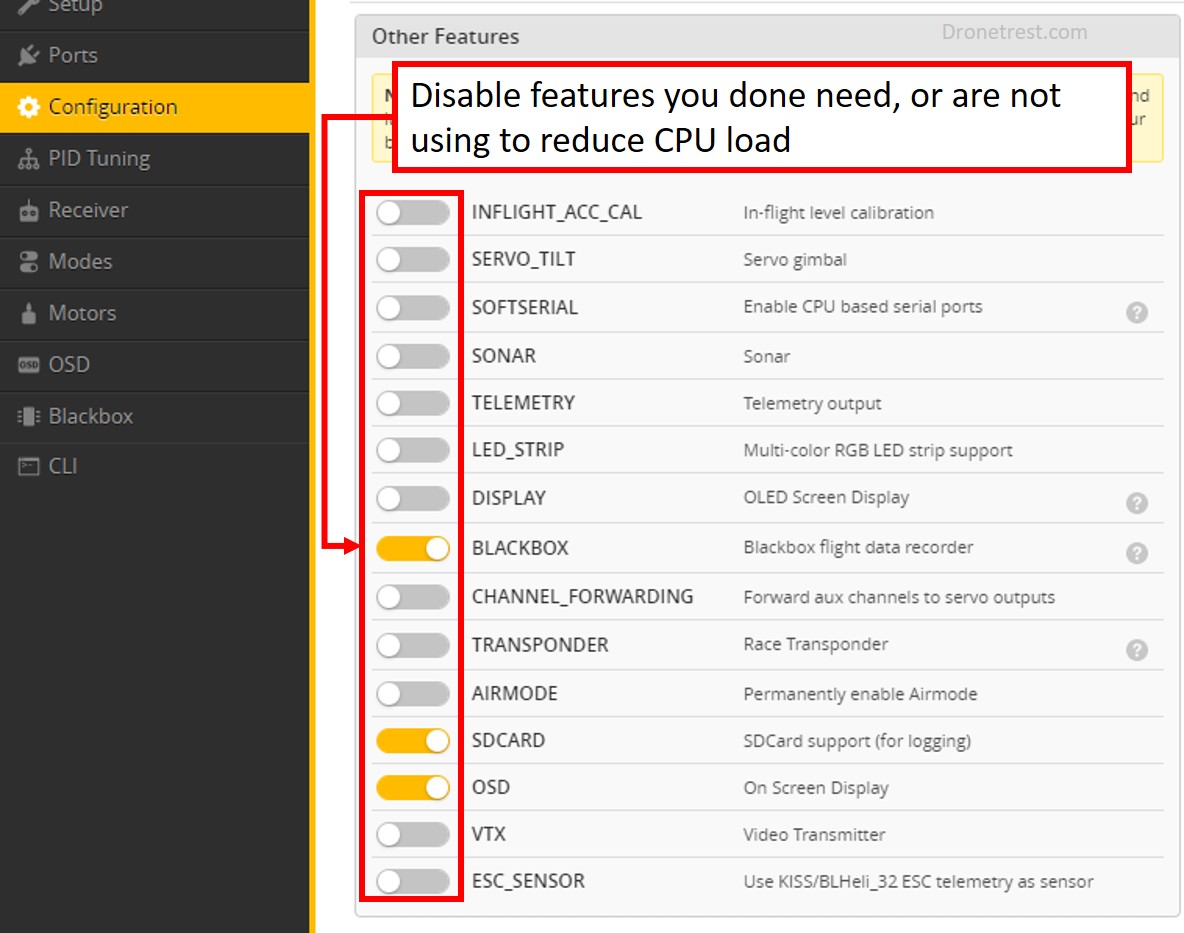
Softserial and LED_stip features have quite a considerable load on your flight controller CPU so you should disable them first
If you have some features that you just can’t disable, you can also try to slow down the flight loop (how fast your flight controller calculates everything). This is also on the configuration tab but under the System Configuration box.
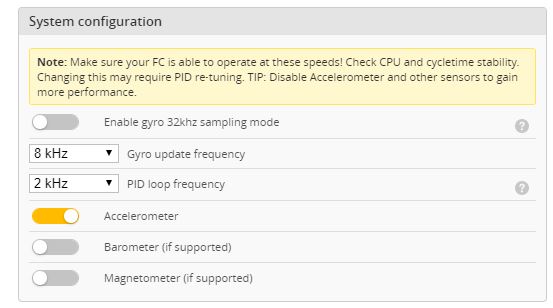
Slowing down the PID loop frequency will massively reduce your CPU load
Here, I suggest incrementally changing the PID loop frequency until you have an acceptable CPU load (less than 50%). But you don’t want to go below 1kHz. You can also slow down the Gyro update rate, but this has a less significant effect. Also if changing the gyro update frequency you must power cycle (remove power completely and reconnect) your flight controller for the change to take effect.
If none of the above help reduces your CPU load, then its time to upgrade your fight controller to a new one running an F4 or F7 MCU.
That covers it
I hope that this article has helped you figure out why your quadcopter is not arming. I have only touched on the most common problems, but if you are still stuck just ask below and we will try to help you figure it out together.