Are you ready to elevate your RC car experience? Adding FPV (First Person View) to your RC vehicle can transform your hobby into an immersive adventure. This guide will take you through a simple, step-by-step process to set up FPV on your car, no matter the make or model. Let’s dive in!
Step 1: Gather Your Materials
Before starting, ensure you have the following materials:
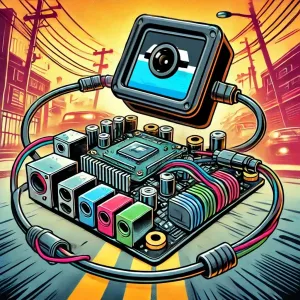
- FPV camera with built-in transmitter
- TheFPV SA Micro AIO FPV Camera And 200mW VTX
- TX07 FPV AIO Camera (BangGood China)
- FPV Goggles/Screen
- EV800D FPV True Diversity FPV Goggles W/ DVR
- EV800D (BangGood China)
- Servo extensions
- Soldering iron and solder
- Wire cutters
- Hot glue or double-sided tape
Step 2: Understanding Your FPV Camera
The FPV camera is essential as it captures the live video feed. Most FPV cameras operate on 5 volts, which is standard for most RC car receivers. This means you can power the camera directly from the receiver, making your setup straightforward and efficient.

Step 3: Preparing the Servo Extension
Start by preparing your servo extension wire. You’ll want to cut one end of the extension off, leaving enough length to connect to your car’s receiver. Here’s how:
- Use good wire cutters to snip off the end of the servo extension that won’t connect to the receiver.
- Identify the wires: typically, you’ll have a negative (black) and a positive (red) wire. Remove the signal wire completely.
- Use an X-acto blade to carefully pull out the plastic piece holding the signal wire.

Step 4: Soldering the Connections
Now, it’s time to solder the camera to the servo extension. Here’s how:
- Heat up your soldering iron and ensure the tip is clean.
- Connect the positive wire from the camera to the positive wire of the servo extension.
- Connect the negative wire from the camera to the negative wire of the servo extension.
If you’re new to soldering, it’s a good idea to watch a tutorial beforehand. It’s a skill that will serve you well in many DIY projects!

Step 5: Connecting to the Receiver
Once your camera is soldered, it’s time to connect it to the receiver:
- Locate an auxiliary port on the receiver—there should be at least one available.
- Plug the servo extension into this port. Since we removed the signal wire, the camera will draw power without sending a signal back.

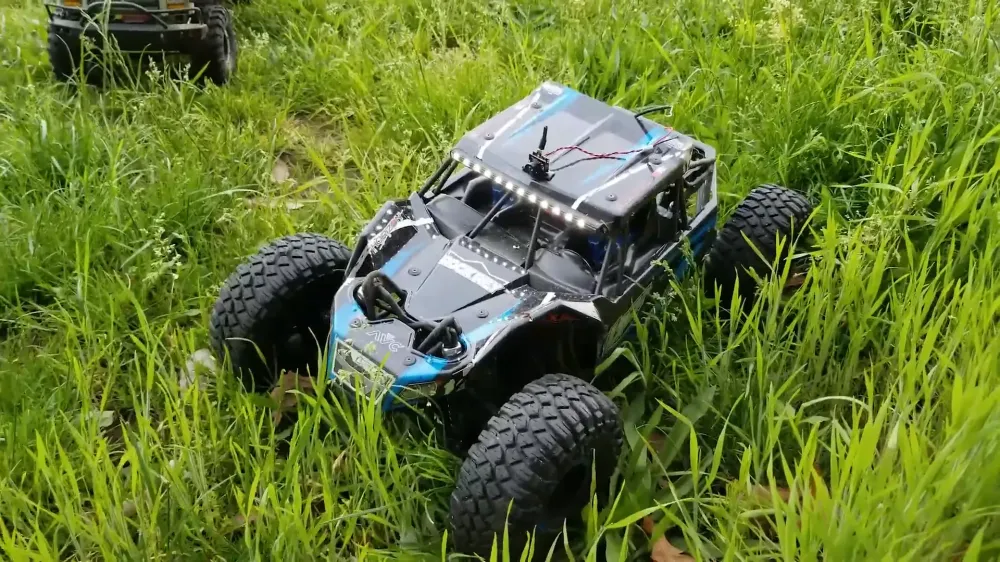
Step 6: Mounting the Camera
Now, let’s mount the camera on your RC car. This is where creativity comes into play:
- Decide where you want to position the camera. It’s ideal to have it angled slightly upwards to capture a view of the ground and surroundings.
- Feed the wires through a hole you’ve made in the body or windshield of the car.
- Use hot glue or double-sided tape to secure the camera in place. Remember, this setup allows for easy swapping between cars, so don’t make it too permanent.

Step 7: Setting Up the Viewing Device
To see what your FPV camera sees, you need a way to view the feed:
- A small FPV screen is a great low-commitment option. Many come with internal batteries and can display the video feed directly.
- FPV goggles provide an immersive experience, allowing you to feel like you’re in the driver’s seat.

Step 8: Testing Your Setup
With everything connected, it’s time for a test run:
- Power on your RC car and your FPV camera.
- Check the video feed on your screen or goggles.
- Take your car for a spin and enjoy the FPV experience!

Step 9: Enjoy Your FPV Experience
Now that everything is set up, you can enjoy the thrill of FPV driving. It truly adds a new dimension to your RC adventures, making it feel like a whole new hobby. Remember, the quality of the video may not be the best when played back, but while you are driving, it's immersive and exciting!
Adding FPV to your RC car is a relatively simple process that can significantly enhance your driving experience. Whether you’re a seasoned hobbyist or just starting, this guide should help you get your FPV setup running smoothly. Don’t forget to play around with different camera angles and setups to find what works best for you.
FAQs
Can I use any camera for FPV?
While you can use different cameras, it’s best to choose one designed for FPV use, as they typically have lower latency and better performance in variable lighting conditions.
How long does the battery last on the FPV camera?
Most small FPV cameras run on a 1-cell battery and typically last about 15 minutes. Connecting to your receiver allows the camera to run as long as your car is powered.
What if I want to upgrade to HD FPV later?
You can always upgrade your camera setup later. Many FPV enthusiasts start with a basic setup and gradually invest in higher-quality cameras and transmitters for better video quality.
Do I need special goggles for FPV?
No, you can start with a simple screen, but goggles provide a more immersive experience and are recommended for a true FPV feel.
Remember to check the links below for the products used in this tutorial, and happy FPV driving!