ExpressLRS (ELRS) has become the go-to choice for many FPV drone pilots, but its complexity can be daunting. This guide simplifies the essentials, ensuring you can navigate the intricacies of this popular RC control link.
TL;DR
- ExpressLRS is a high-performance RC control link popular among FPV drone pilots.
- Choose between 900 MHz and 2.4 GHz frequency bands based on your needs.
- Binding receivers is a unique process with options like bind phrases.
- Packet rates and telemetry ratios can be adjusted for optimal performance.
- Firmware updates can be done via web-based flashers for convenience.
Step 1: ExpressLRS Can Be So Confusing
Many new users find ExpressLRS bewildering. It’s popular for its performance, but the steep learning curve makes it feel overly complicated. Understanding the basics can ease the transition into using ELRS effectively.
Step 2: What is ELRS?
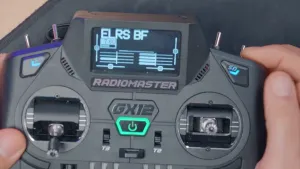
ExpressLRS is an RC control link, designed to be integrated into radios like the RadioMaster g x twelve or as a module for non-LRS radios. It connects your controller to the quadcopter, allowing for seamless operation. Despite its complexity, ELRS is built for high performance.

Step 3: 900 MHz vs. 2.4 GHz ELRS
ELRS operates on two frequency bands: 900 MHz and 2.4 GHz. The 2.4 GHz band has smaller antennas, making it more compact but less capable of penetrating obstacles compared to the larger 900 MHz antennas. The choice between these bands affects range and performance.

Step 4: Dual-Band ELRS is the Way to Go!
The Nomad module allows you to switch between 900 MHz and 2.4 GHz, providing flexibility for different flying environments. This adaptability is essential in races with multiple pilots where congestion can lead to performance issues.

Step 5: Overview of ELRS Receivers
ELRS receivers come in various types. The RP series operates on 2.4 GHz, while the BR series functions on 900 MHz. The XR series is dual-band, allowing you to switch frequencies via software settings. Each type has its advantages depending on your application.
Step 6: All ELRS Hardware is Cross-Compatible
One of the significant advantages of ELRS is its open-source nature, meaning hardware from different manufacturers is often cross-compatible. This makes it easier to mix and match components, but caution is advised—quality can vary.
Step 7: How to Bind ELRS
Binding an ELRS receiver to a transmitter involves a unique process. This includes using bind phrases, which some find handy while others may find them cumbersome. Understanding the simple binding method can streamline your setup.

Step 8: ELRS Packet Rate
Packet rate is crucial for performance. Higher rates yield lower latency but reduce range. Selecting the right packet rate can depend on your flying style—racers may prefer higher rates for responsiveness, while long-range pilots might opt for lower rates to extend distance.
Step 9: Low Band vs. 2.4 vs. Xross Band
Choosing the right band is essential based on your environment and the number of pilots in the air. The flexibility of the Nomad module allows you to adapt as needed, making it a solid choice for varying conditions.

Step 10: Telem Ratio
Telemetry informs you about various aspects of your flight. Adjusting the telemetry ratio ensures you receive enough data without interrupting control signals. The standard setting is recommended for most users.

Step 11: Switch Mode
Switch mode options can affect performance. Most users should stick with the wide setting for optimal results, while hybrid modes are generally outdated and unnecessary for modern setups.

Step 12: TX Power
Transmit power impacts range and battery life. Setting it to one watt typically provides a good balance. Dynamic power options allow for efficiency but can lead to fluctuating link quality.

Step 13: ELRS Web-based Flasher
Flashing firmware is often necessary for updates or bug fixes. The web-based flasher simplifies this process. It’s user-friendly, allowing you to update without needing complex software installations.
Step 14: ELRS Bind Phrase
Bind phrases simplify the binding process. By assigning a unique phrase, you can easily connect multiple receivers to the same transmitter without hassle. This is especially useful for managing multiple drones.

Step 15: ELRS WiFi Interface
Many ELRS devices feature a WiFi interface, allowing for easy configuration. However, be aware that this can interfere with your internet access, as your device will connect to the ELRS network instead.

Step 16: Flashing a Receiver via WebUI
Flashing receivers can be done through the web interface. This method is often more straightforward than using traditional methods, especially for compact receivers without USB ports.

Step 17: Can't Find ELRS Target Name? What Now?!
If you encounter issues finding your target name, consult the web interface for insights. Sometimes the firmware may not clearly identify the receiver, leading to confusion.

Step 18: ELRS WiFi Means You Can't Access the Internet
Connecting to the ELRS WiFi can block your internet access. Ensure you manage your connections wisely to avoid disruptions during critical operations.

Step 19: My 2nd Favorite Way of Binding: Flashing
Flashing receivers not only updates firmware but can also simplify the binding process. It’s efficient for those who regularly update their systems.

Step 20: Back Up Your Binding Phrase
A unique binding phrase tells every ExpressLRS transmitter and receiver in your fleet “we belong together.” ExpressLRS’ own docs recommend at least eight alphanumeric characters so you don’t share the airwaves with the pilot next to you.
You enter the phrase when you compile firmware in ExpressLRS Configurator or type it later in the receiver’s WebUI once you’re on v3.0+.
The phrase isn’t a password—its job is anti-collision, not encryption—so obscurity isn’t the point; uniqueness is.
Why back it up?
If you lose or forget the phrase, every transmitter and receiver must be reflashed before they’ll talk to each other again—ask anyone who’s soft-bricked a fleet after a laptop crash.
Store the phrase in a password manager or cloud note you’ll actually keep. A quick phone screenshot of the Configurator page works too.
Step 21: ELRS Script Won't Run
If you encounter issues with the ELRS script not running, it may be due to missing files or incorrect settings. Always verify your setup before diving into troubleshooting.
Step 22: Can't Select CRSF for Internal Module
Sometimes, users struggle to select CRSF for their internal module. This usually indicates a configuration issue that needs addressing.

Step 23: Set Baud Rate Correctly
Setting the baud rate too high can lead to errors. Ensure it's appropriately configured for your hardware to avoid connection issues.

Step 24: Sampling Normal vs. OneBit
Most users should leave sampling set to normal unless using older hardware that requires adjustments. This ensures optimal performance without complications.

Step 25: ELRS Script Missing
If the ELRS script is missing from your setup, you’ll need to download it and ensure it's placed in the correct directory on your device. This is crucial for functionality.

Step 26: What Next?
Once you've grasped the essentials of ELRS, explore further resources and tutorials to deepen your understanding. The journey doesn’t end here; there’s always more to learn.
Takeaway Box
- ELRS offers flexibility and performance for FPV pilots.
- Choosing the right frequency band is essential for optimal performance.
- Bind phrases simplify the binding process for multiple receivers.
- Regular firmware updates ensure your system remains up-to-date.
- Always verify your configurations to avoid common pitfalls.
This article was based from the video ELRS Complete Beginner Guide 2025