In this short, practical Quick Tip video Painless360 walks through how to edit telemetry sensors in EdgeTX when a sensor — most commonly a battery voltage — is reporting incorrect values. If your receiver or flight controller is sending down wonky telemetry, you can either fix it on the flight controller (recommended) or apply corrections inside the radio itself. This article summarises the video, adds a bit of technical context and a few tips so you can get reliable telemetry without guessing your battery's state of charge.
- Why telemetry sometimes reads wrong
- Where to fix the problem (flight controller first)
- The EdgeTX sensor edit screen explained: name, ID, units, precision
- Practical fixes: Offset, Ratio, Auto offset, Positive, Filter, Logs
- Step‑by‑step example (receiver battery / RXBAT)
- Testing and verification guidance
- FAQ and troubleshooting
Why telemetry can be wrong (and where you should really fix it)
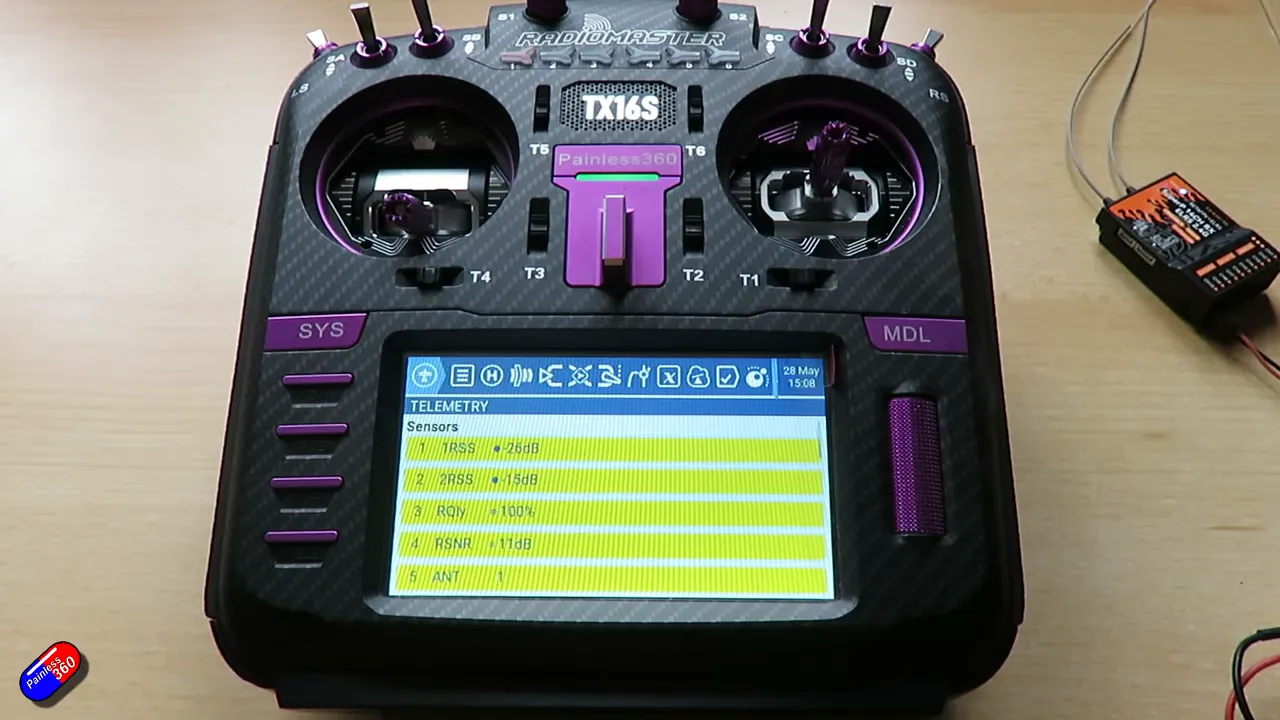
Painless360 opens by showing a receiver bound to a radio with telemetry being streamed down. Telemetry errors come from a few places: incorrect scaling on the flight controller, bad sensor wiring, an unusual voltage divider on a receiver, or a mismatch between the telemetry ID/unit and what EdgeTX expects. If you have a flight controller (BetaFlight, iNav, ArduPilot, Betaflight-based boards), fix the scaling there first — these stacks usually let you change the multiplier used for reported battery voltage. It's cleaner, less finicky, and avoids hiding a real hardware or wiring issue.
EdgeTX telemetry sensor fundamentals — what you're actually editing
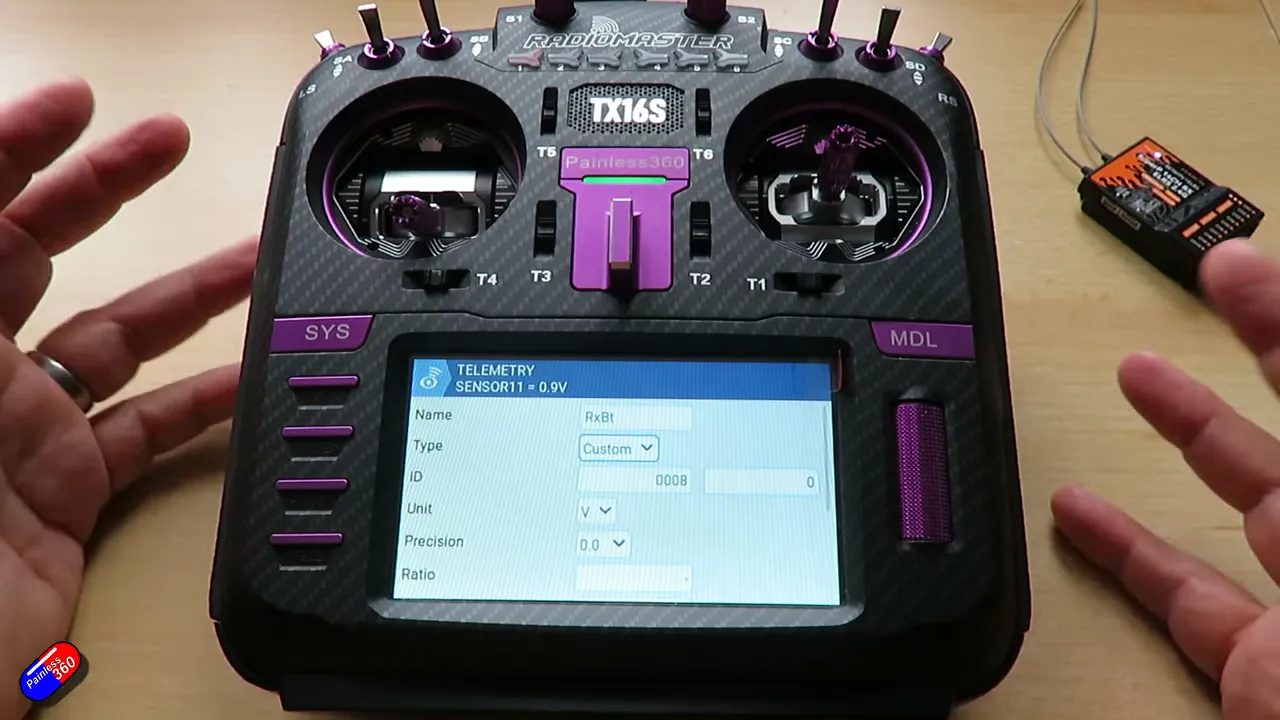
When you edit a telemetry sensor in EdgeTX you see a handful of fields. Painless360 walks through them one by one — here's what each does:
- Name — The display label (e.g. RXBAT).
- Type — Custom or Calculated. Calculated sensors can be derived from other telemetry values.
- ID — Tells EdgeTX what sensor type it is (voltage, GPS, altitude, etc.) and the instance number. Example: 0008 = voltage, sensor 0 = first voltage sensor.
- Unit — Unit that will display (volts, metres, mph, etc.).
- Precision — Decimal places to show.
- Ratio — A multiplier applied to the raw value. Use this when the scaling is wrong across the range.
- Offset — A fixed additive correction. Useful if the reading is consistently high/low by a fixed amount.
- Auto offset — Uses the first value received as the zero reference (handy for relative altitude or zeroing ground-level values).
- Positive — Hides negative values by clamping them to zero.
- Filter — Smooths the data by averaging the last five samples to reduce noisy alerts.
- Logs — Whether the value is saved to SD logging (if enabled).
The practical approach: Offset vs Ratio (and when to use both)
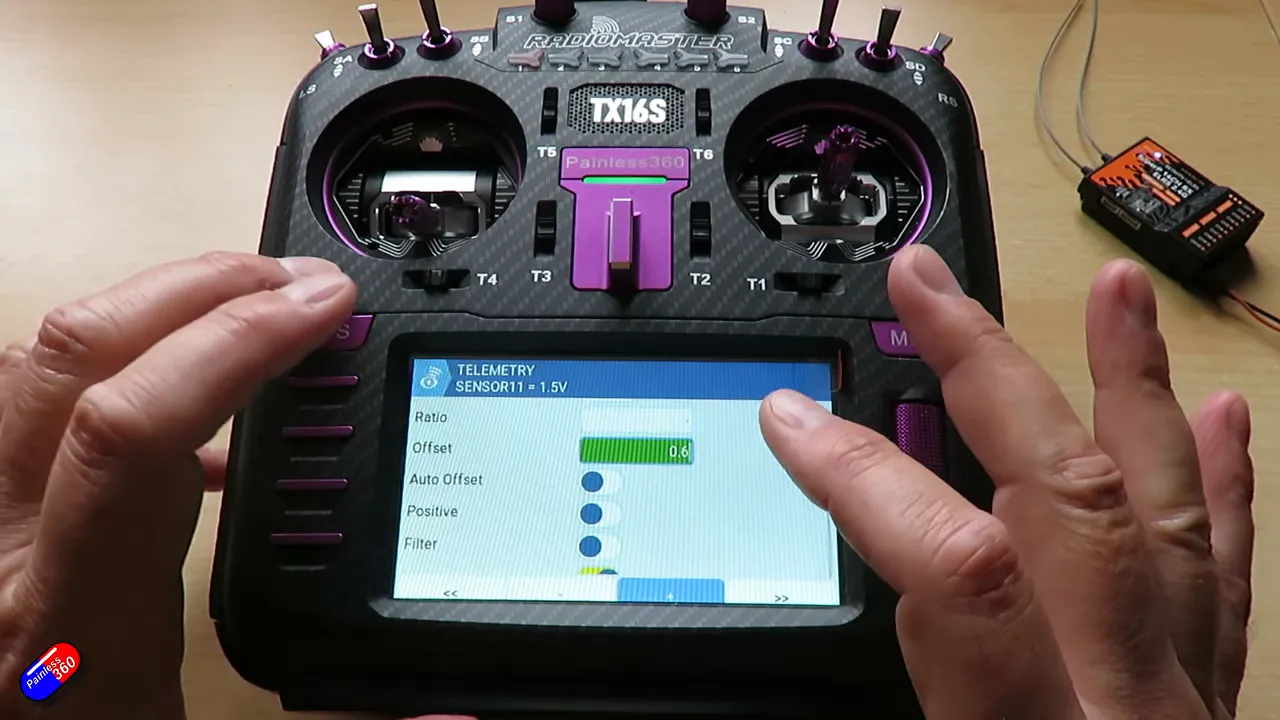
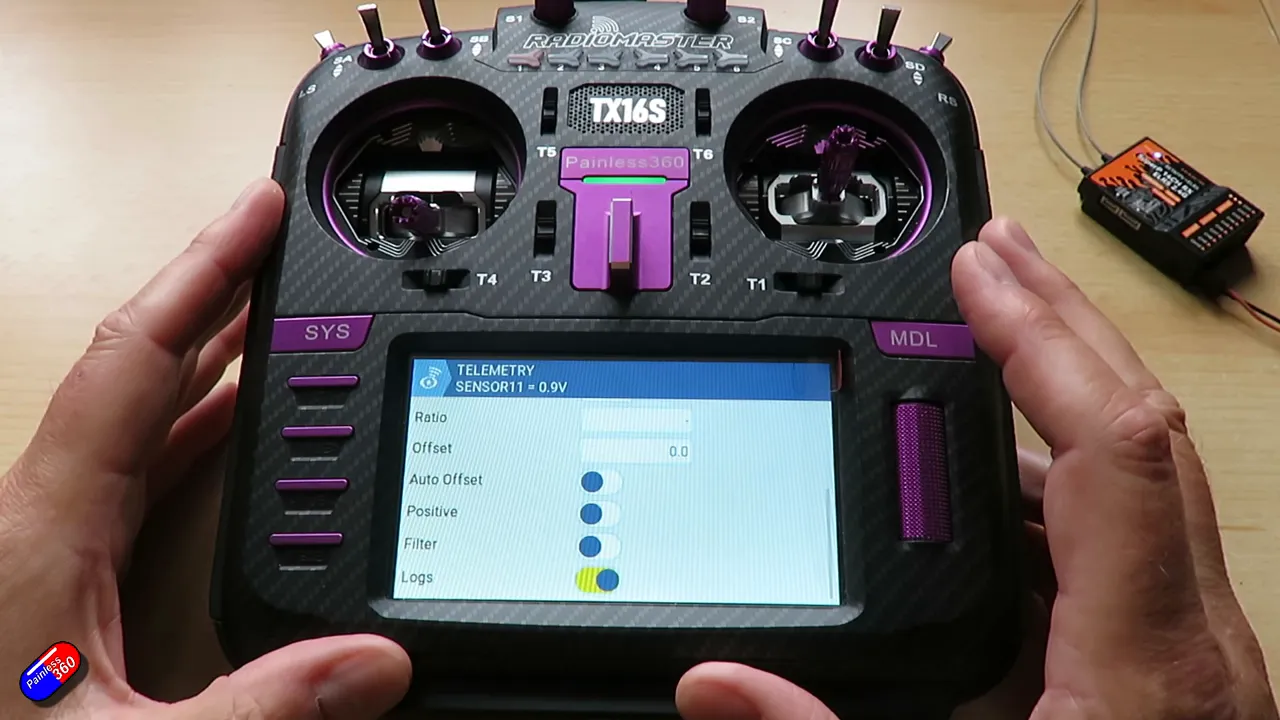
Painless360 demonstrates editing the RX battery reading which starts at 0.9V on his setup — clearly wrong for a real flight battery and an ideal example for demonstrating corrections.
Two basic corrections are available:
- Offset — Adds (or subtracts) a fixed value. Use when the sensor is consistently wrong by a fixed amount across the whole range (for example always reads 0.5V low).
- Ratio — Multiplies the reading. Use when the scaling is off (e.g. at 4.2V the radio reads 3.8V and at 3.5V it reads 3.2V — the error changes with voltage).
In practice you often use both. Painless360 suggests first see if an offset alone will bring you close, but be prepared to tweak the ratio if the error varies with voltage.
Step‑by‑step: Fix RXBAT in EdgeTX (condensed workflow)
- Bind the receiver to the radio and power it so telemetry appears.
- Open Models → Telemetry and locate the sensor (e.g. RXBAT).
- Select the sensor and choose Edit.
- Inspect ID, unit, precision to confirm it’s a voltage sensor (ID 0008 usually means voltage).
- Clear any existing offset and start by adding a small offset while watching the top value update — Painless360 scrolls the offset and watches the value move from 0.9V to 1.2…1.5V.
- If the entire range still scales wrong, change the ratio (multiplier) until the high and low voltages line up.
- Test at three points: fully charged, partially charged, and discharged. Make sure the corrected telemetry tracks the battery across the full range.
- Use Auto offset for things that need a ground reference (like altimeter zeroing), and enable Filter if the sensor bounces around and is triggering spurious alerts.
Testing and verification — don't trust a single reading
Don't be lazy: Painless360 recommends checking at multiple battery states. If you calibrate at full charge only, a non‑linear error (scaling problem) will still leave you with inaccurate readings lower in the discharge curve. Calibrate at:
- Full charge (4.15–4.20V per cell typical for LiPo)
- Mid charge
- Near-empty but safe level
If you know the actual voltages at those points you can do simple algebra ("back of a fag packet maths", as Painless360 puts it) to compute a best-fit ratio and offset so the radio reads correctly across the curve. Example method: pick two known real voltages and the two reported values, solve the linear equation value_corrected = raw * ratio + offset for ratio and offset.
Practical caveats and when not to fix in EdgeTX
Painless360 makes a useful point: if your flight controller can do the scaling, do it there. Fixing telemetry in EdgeTX is a last resort because it is finicky and effectively hides the root cause. Also beware of:
- Applying large offsets that mask wiring faults or a dying battery.
- Forgetting to test across the range (you may get a perfect reading at one point and be wildly off at another).
- Using Auto offset on a sensor that shouldn't be zeroed — know what the setting does before enabling it.
Tools, math and a quick formula
If you want to compute the ratio and offset from two measurement pairs:
- Let raw1 and raw2 be the two values reported by the telemetry.
- Let true1 and true2 be the actual measured voltages at the same times.
- Solve ratio = (true2 - true1) / (raw2 - raw1)
- Then offset = true1 - raw1 * ratio
That gives you a linear correction true = raw * ratio + offset. Works well for voltage dividers and many simple telemetry issues.
Critical takeaways — bottom line and my two pence
Painless360's demonstration is short, practical and useful. Editing telemetry in EdgeTX is a handy tool when you can't change the flight controller or when a remote receiver reports differently. But it's a band‑aid: prefer fixing on the flight controller if possible. If you must edit in EdgeTX, use the combination of offset and ratio, test across multiple voltages, and use the Filter and Positive options to reduce noise and prevent confusing negative numbers on displays and alerts.
FAQ
Why should I fix telemetry on the flight controller rather than in EdgeTX?
Fixing it on the flight controller is cleaner because the flight controller measures the battery directly and can apply the correct scaling at source. That keeps telemetry accurate for all consumers (OSD, on-flight logging and radio) and prevents you masking wiring or hardware faults.
What is the difference between ratio and offset and when do I use each?
Offset adds a fixed amount to the reported value (useful for a constant bias). Ratio multiplies the reported value (useful when the error scales with the measurement). Use offset for constant errors and ratio for scaling errors; many situations require both.
How do I test that my corrections are valid?
Compare telemetry against a reliable multimeter reading at multiple points: fully charged, mid-charge and near-empty. If the corrected telemetry matches the multimeter across the range, your ratio and offset are good.
What does Auto offset do and when should I enable it?
Auto offset uses the first telemetry sample as a zero reference and subtracts it from subsequent readings. It's useful for relative measurements (e.g. setting ground level as zero for altitude). Don’t use it for absolute measurements like battery voltage.
My sensor value jumps around. Should I use Filter?
Yes — enabling Filter averages the last five samples to smooth noise. Use it if you get spurious alarms or the number is jittery, but remember it will introduce a little lag to the displayed value.
This article was created from the video EdgeTX Quick Tip: How to edit telemetry sensors (to fix things like wrong voltage readings).