In this hands‑on build report, Painless360 walks through the exact mods and wiring tweaks he made to his TBS Chupito before its maiden. If you want the short version: he made the tail removable, fitted carbon spars, sunk magnets for a snap‑fit tail, shoehorned a Walksnail HD FPV unit into the nose, and wrestled INAV into sensible servo throws. Below is a blow‑by‑blow with the technical bits, the gotchas, and links to further reading so you don’t repeat his mistakes.
Contents
- Why the tail is removable (and how)
- Wing and spar assembly
- Servos and INAV tuning
- Electronics: flight controller, antennas and HD FPV install
- Weights, battery choice and maiden plan
- Critical notes and tips
- FAQ
Why Painless360 made the tail removable
One of the first and most useful mods in this build: make the tail removable so the motor mount can slide out the back. Painless360 glued the bottom half of the vertical stabiliser permanently for ground‑strike resilience (Yuhu Paw was used). The top section, however, is designed to be removable so the motor tray can be swapped without destroying the foam shell.
How it’s held together:
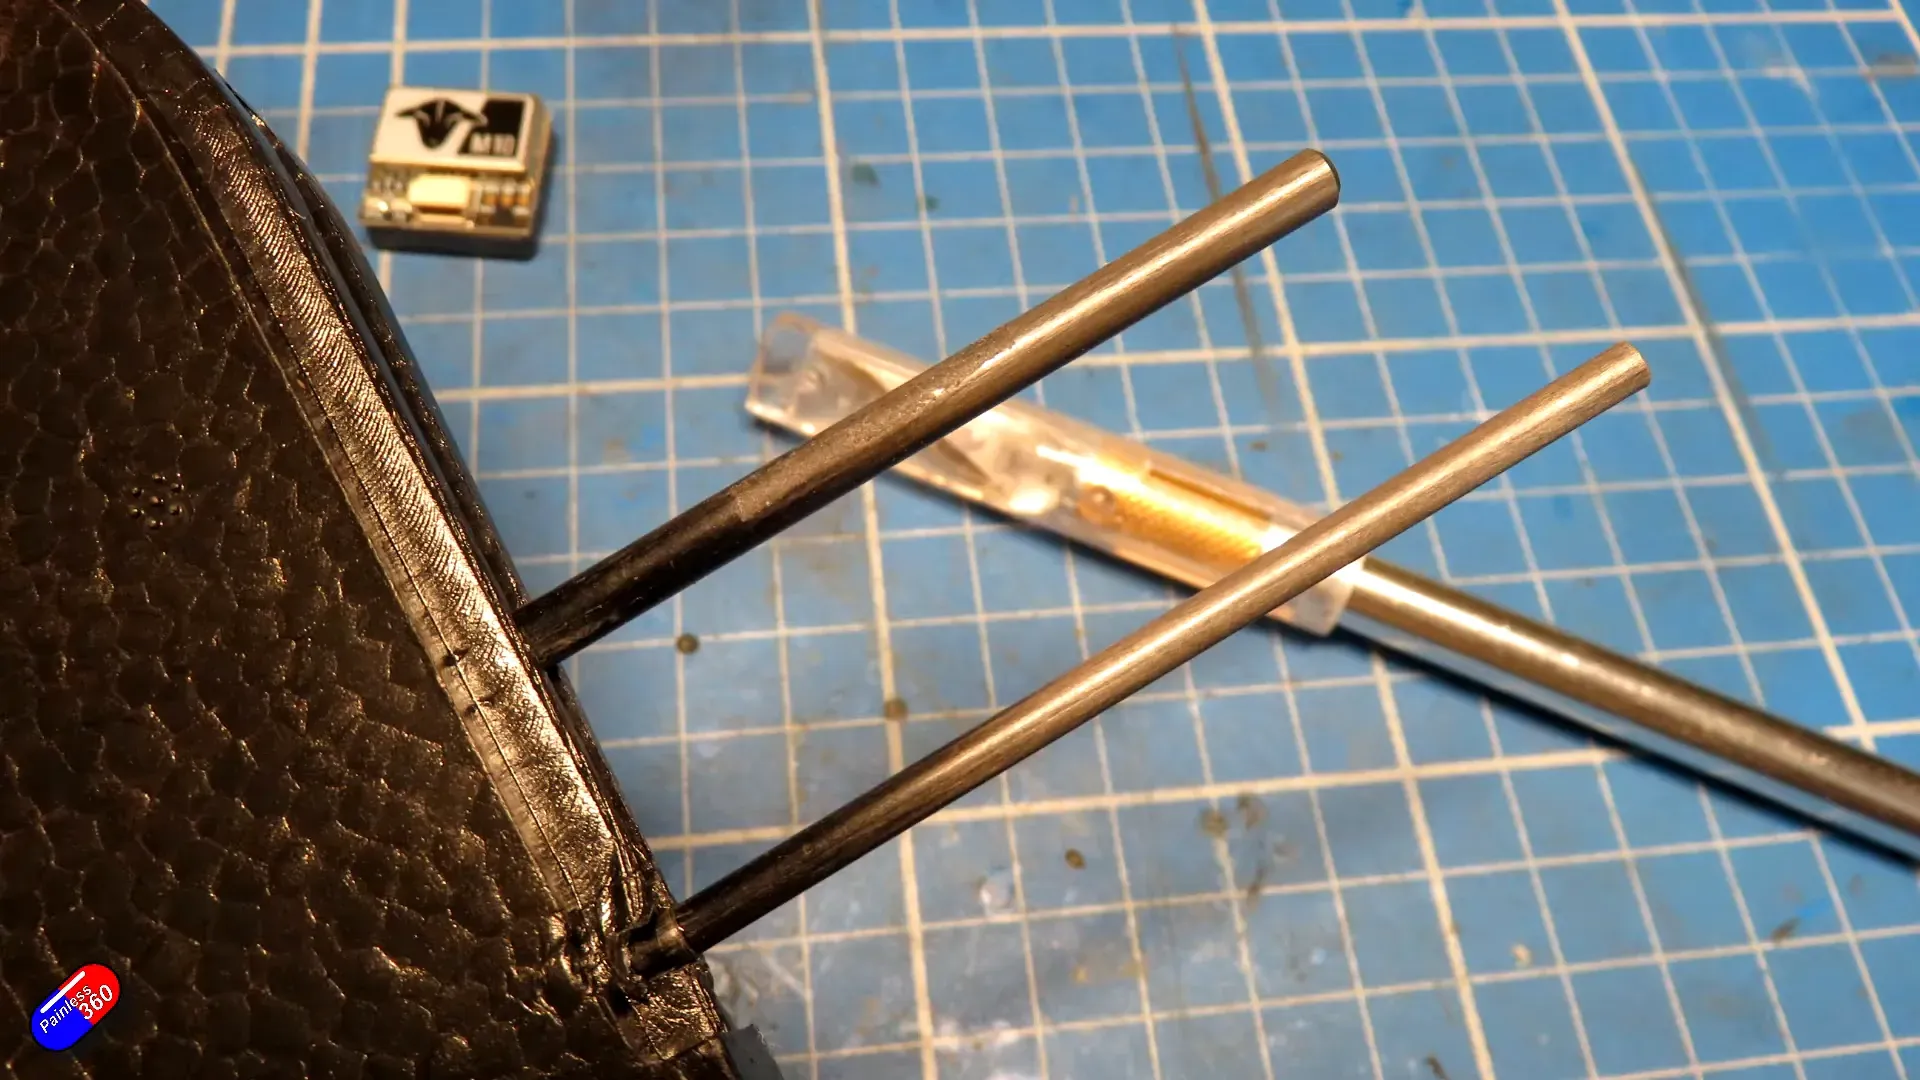
- Two 4mm carbon rods (cut and glued into the tail recess) act as spars that push through holes into the bottom tail piece and lock the rear assembly in place.
- Neodymium magnets sunk into mating faces provide a positive “snick” so the top tail clicks home and won’t rattle out during transport.
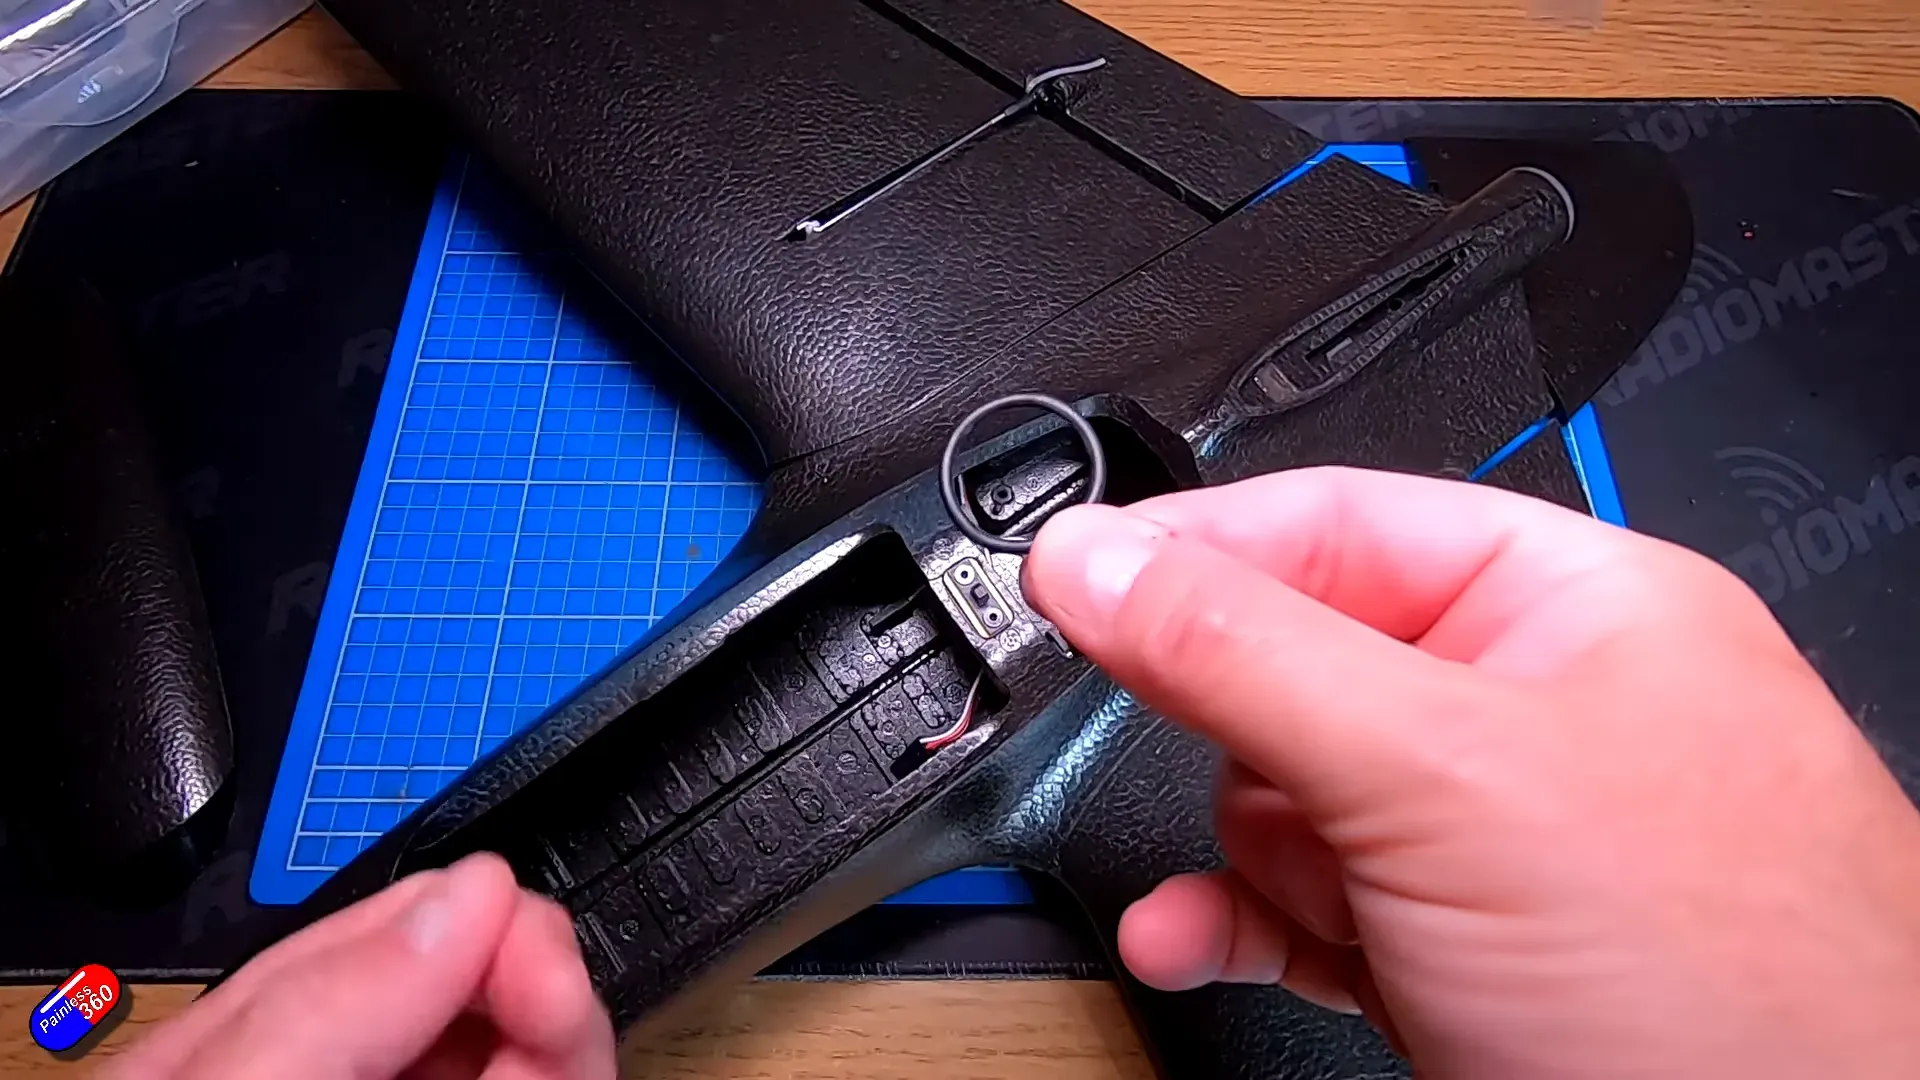
- A rear horizontal spar (the long through‑wing bar) plus the rubber O‑ring system holds the wings on—so don’t lose that O‑ring.

Wing assembly and control surface fit
The Chupito’s wings are easy to assemble but there are details worth calling out:
- The supplied control horns and carbon reinforcement in the control surfaces are well prepped.
- Servos are fitted into the wing bays; Painless360 recommends using a servo checker to centre at 1500µs before fitting the arm.
- He used the third hole on the servo arm (counting from the horn pivot); this gives significant throw and keeps the horn nearly flush with the wing surface. If you want maximum deflection for aggressive flips, the second hole might be better—but third hole will be plenty for stable, aerodynamic flying.
- Ball joints on the supplied linkages have a shallow thread on the ball: screw the ball into the plastic joint before pushing it on, then secure with the nylon nut.
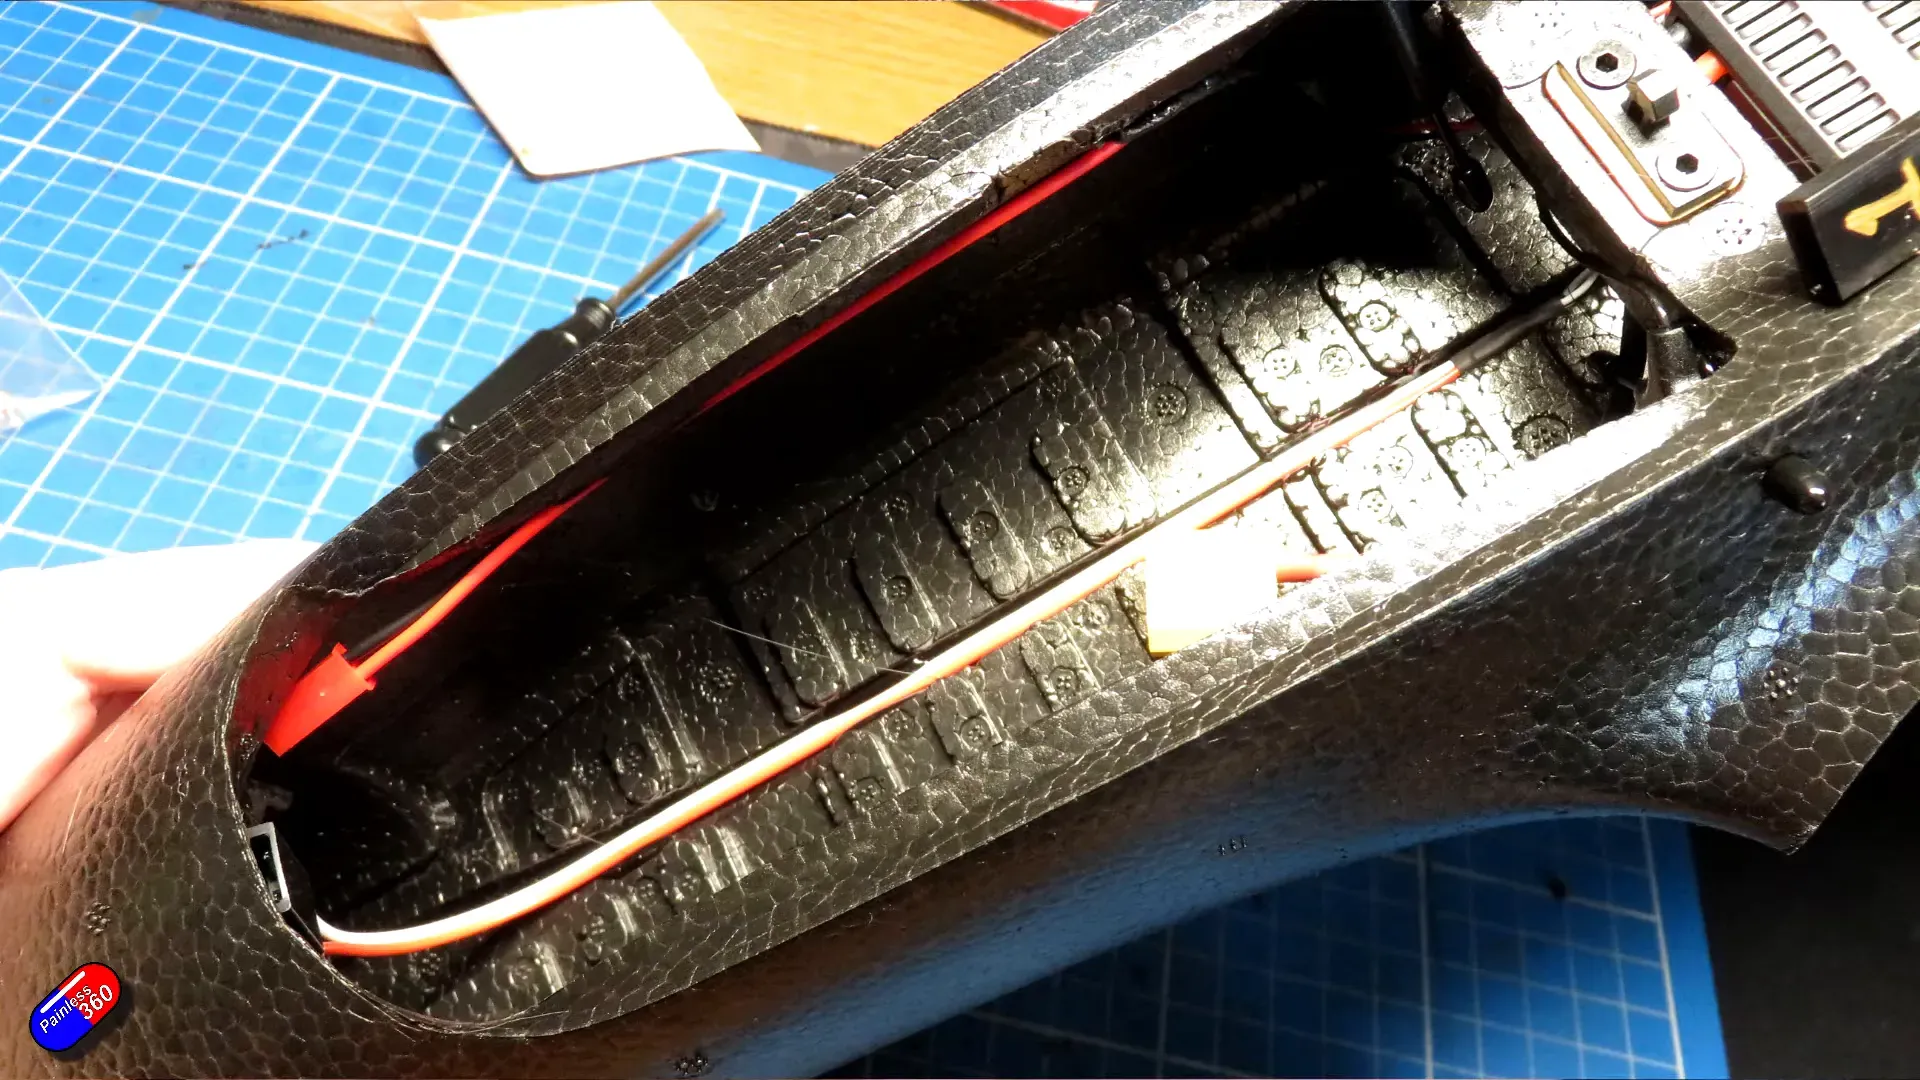
Where the electronics live
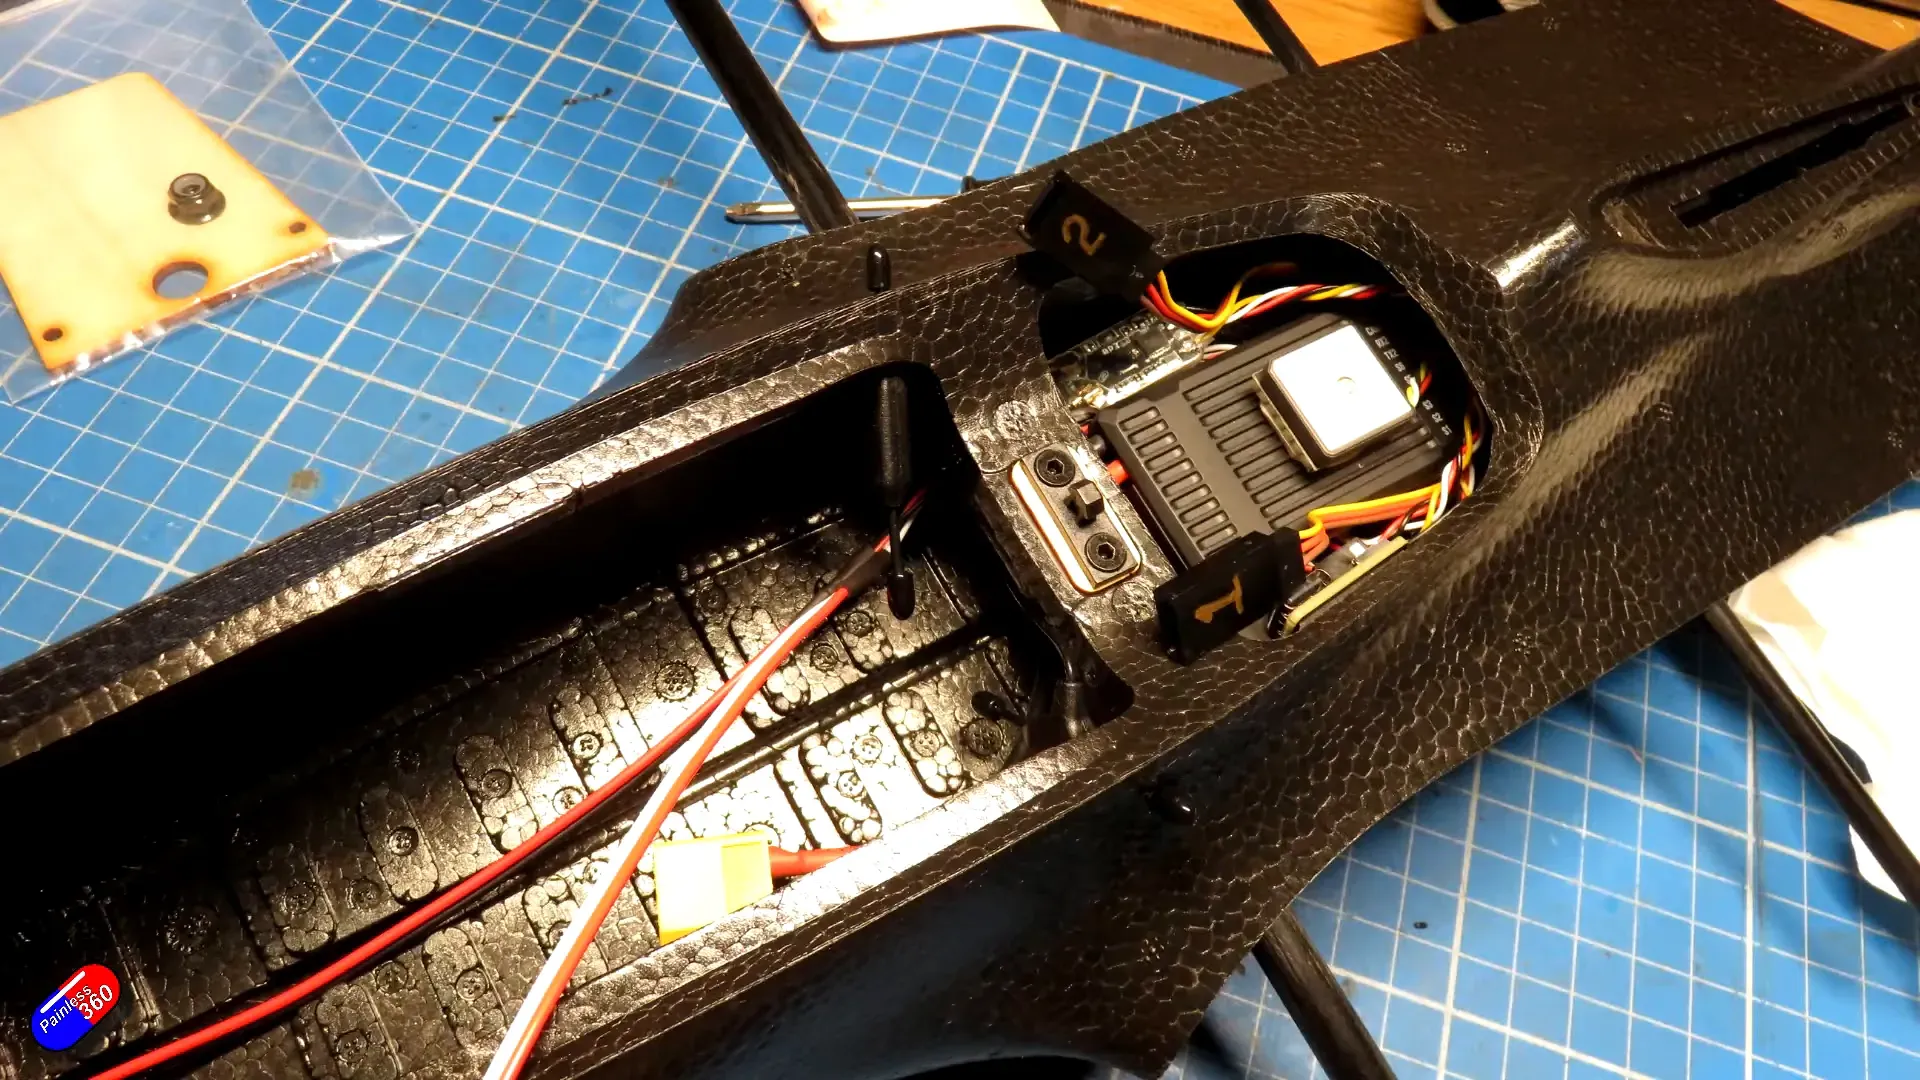
With the tail removable, the motor tray slides out the back, motor wires feed forward under the flight controller, and the rest of the stack tucks neatly into the nose:
Key points from the install:
- The flight controller slides into a snug bay; cut off the rear two tabs first (as Painless360 demonstrates) so it seats correctly.
- When fitting the motor mount screws, use thread‑lock. Trust him: you don’t want the mount walking loose mid‑flight.
- Prop clearance looks good—the supplied prop sits clear when the tail is on the ground, which should reduce prop‑strike risk.
Antenna placement and receiver
Carbon everywhere. That’s the problem. Painless360 mounted a Diversity ExpressLRS receiver tucked to the left side with the antenna nubbins poking up through small hot‑glue‑sealed holes so they clear the body but stay reasonably separated from carbon. He used two small dabs of hot glue and foam double‑sided tape for the USB beeper board.
Note: he deliberately didn’t mount the RX antennas in the tiny tail cavity because he prefers a V configuration and wanted to keep antennas as far from big carbon as possible.
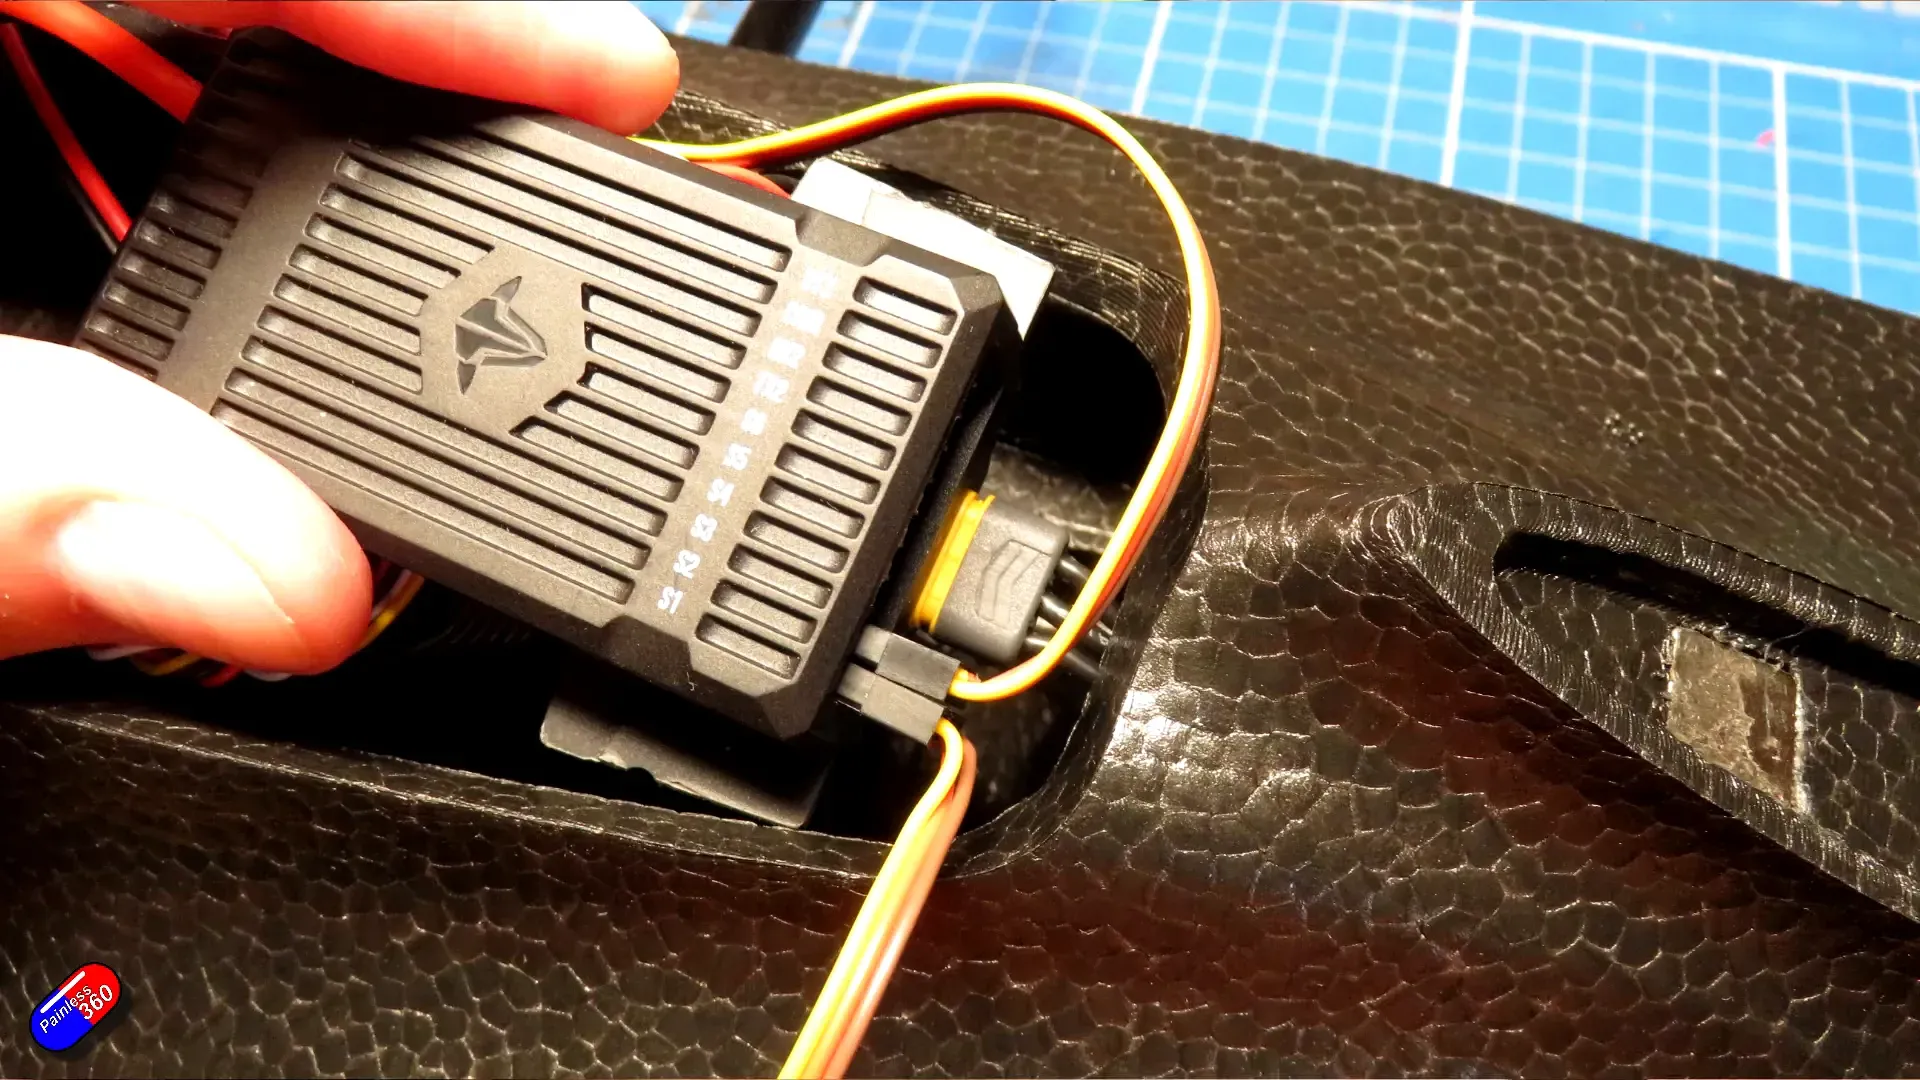
HD FPV (Walksnail) cage fit and mods
Painless360 squeezed a Walksnail HD (version 1) unit into the nose. The cage is flexible but needed a small modification:
- He cut off the bottom spar of the Walksnail cage so the camera could sit further forward without re‑routing or cutting the camera cable.
- The camera needed shims: the cam body is ~19mm wide while the cage was about 20.4mm—so he 3D‑printed 0.7mm shims each side to centralise and secure the camera.
- The module is held with a zip tie over a small wooden spacer to allow some airflow behind the unit. He cut recesses for the zip tie to let the whole assembly slide into the nose cleanly.
- Antennas were placed into small slots cut into the rounded chassis—no Aeropods this time due to a lack of flat surface.
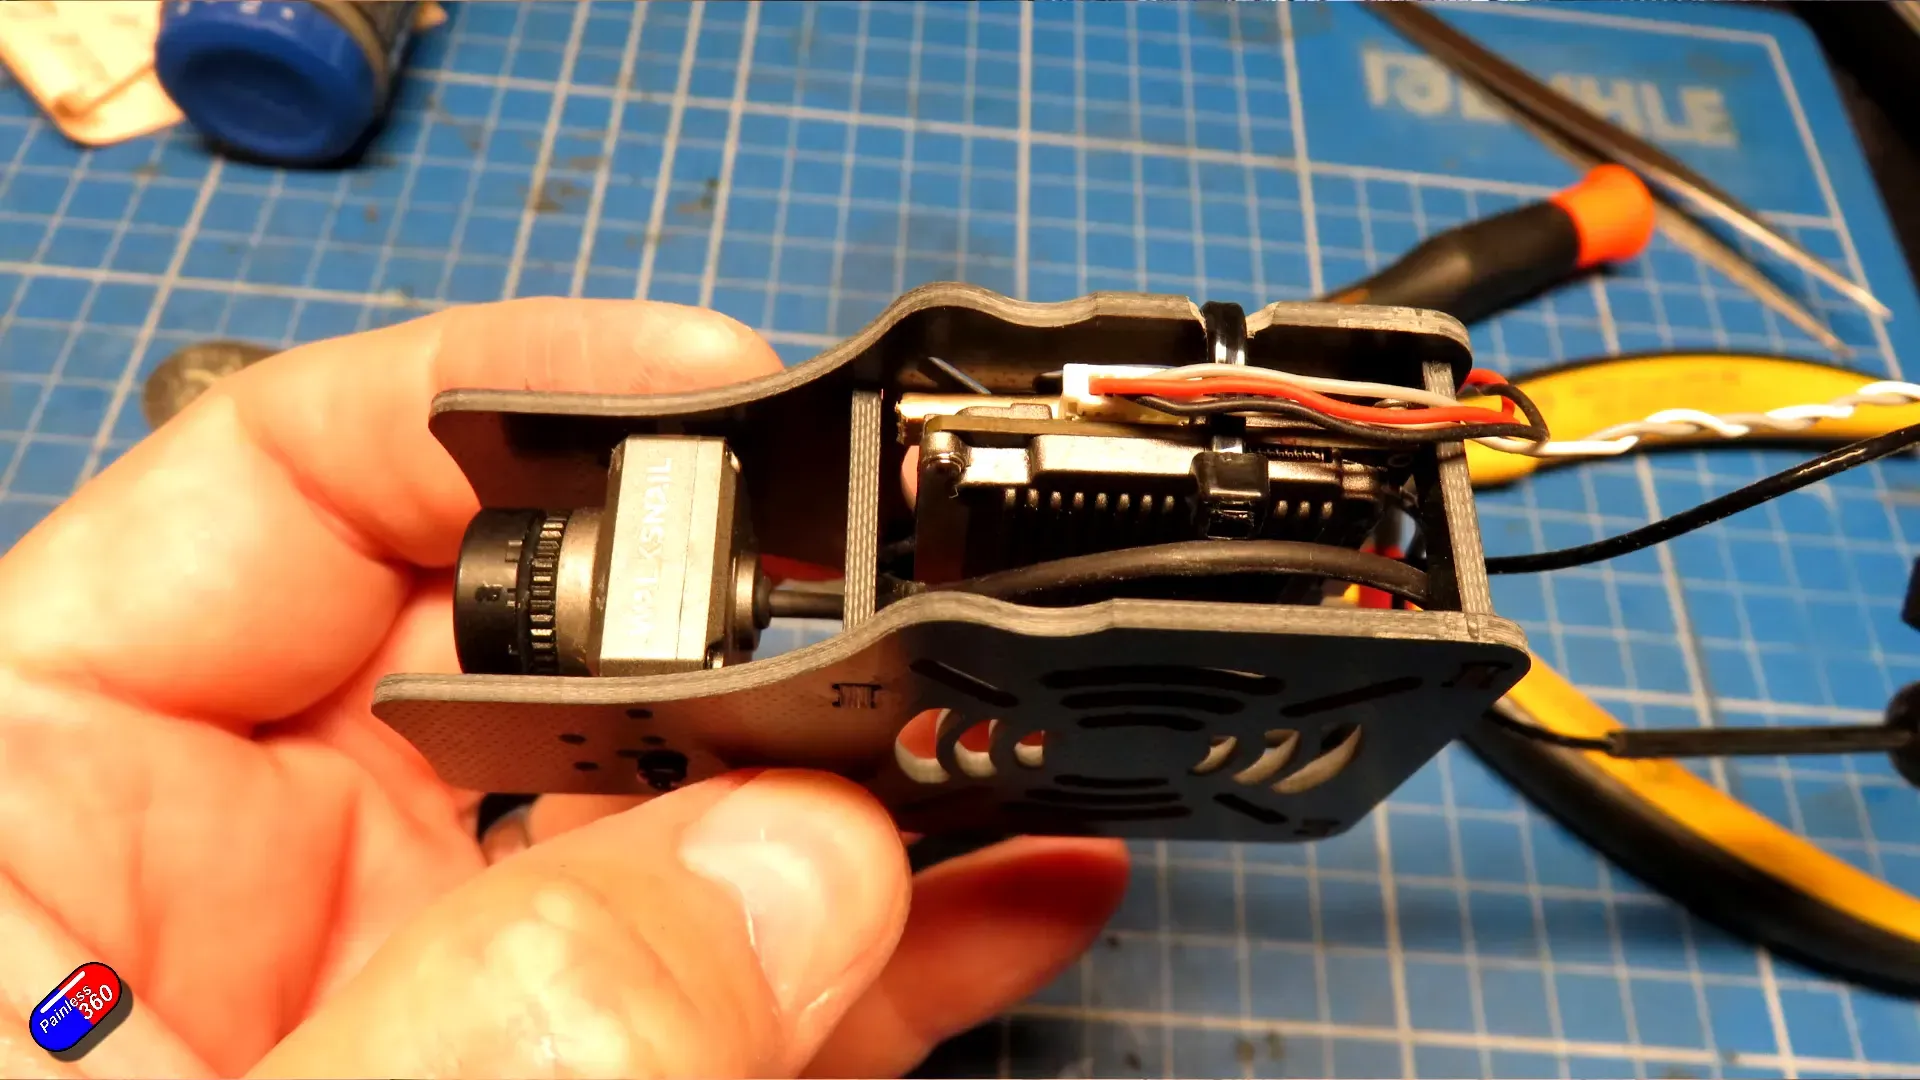
Cable routing: there’s a shallow channel under the mainboard where Painless360 runs the VTX signal cable and a separate power cable. He keeps power and signal physically separated to minimise EMI—old habit, good practice.
INAV setup and servo throws
Painless360 highlights an unusual output mapping on this TBS AIO: servo output 7 is used for the ESC/motor, while servo outputs 1 and 2 drive the wing servos. That’s worth checking in your own setup before plugging anything in.
Commanded throws vs actual throws:
- TBS recommends relatively large travel values—Painless360 mentions aiming for big numbers but, in practice, dialled the system back to get stable control.
- He centred servos at 1500µs, then reduced overall travel (servo rate) to 70% for Servo 1 and Servo 2 to calm down over‑enthusiastic movement.
- After endpoint and rate tweaks he ended up with roughly 15mm roll and 12mm pitch real‑world deflection (using the third hole on the servo arm), which he’s happy with for a more aerodynamic, not‑too‑twitchy setup.
Mass, battery and the maiden plan
Numbers, because you asked:
- Battery hatch: 8 g
- Airframe (no battery): 399 g
- Battery chosen: 182 g
- Total ready‑to‑fly estimate: ≈ 581 g
Although the Chupito is rated for 4–6S and can be happy on 6S for blistering speed, Painless360 plans the maiden on 4S to check handling and give a more backpackable, versatile flight envelope. He expects forward‑swept wing aero to produce forgiving handling and good slow‑speed float.
Critical notes & practical tips
- GPS placement: he mounted the GPS on top of the flight controller and it reports working, but warns you wouldn’t want the magnetometer there (put it away from ESCs and heavy current paths).
- Thread‑lock motor mount screws—non negotiable.
- Keep that rubber O‑ring safe. Losing it complicates wing retention.
- Test antenna positions statically before permanent glue: the Walksnail antenna slots are trial fitted to minimise drag and allow future changes.
- If you plan to swap motors, the removable tail + sliding motor tray is a huge advantage—do the carbon spar + magnet trick if you want the same flexibility.
Conclusion — should you copy his mod?
If you want a Chupito that’s easy to service and swap motors without traumatic foam surgery, yes: copy the removable tail + carbon spars + magnet snap fit. If you prefer stock simplicity, the TBS unit is designed to go together well out of the box. Painless360’s build keeps things light (~581 g with chosen battery) and makes sensible compromises—moderate servo throws, careful antenna placement, and a conservative 4S maiden flight. It’s an approach that favours versatility over raw speed.
FAQ
Why make the tail removable?
So the motor tray can slide out and be swapped quickly without cutting or destroying the foam. Carbon spars plus magnets provide stiffness and a clean snap fit.
What motor / battery should I use for the maiden?
Painless360 plans a 4S maiden even though the Chupito will happily run 4–6S. 4S gives a gentler, more controllable first flight—switch to 6S later if you want top‑end speed.
How did he stop servos from over‑reacting?
Centre servos at 1500µs, then reduce overall travel to ~70% for the wing servos and tweak endpoint percentages in INAV to reach the practical throws he wanted (~15mm roll, ~12mm pitch measured on his build).
Where to put the GPS?
Top of the nose worked for his GPS-only use (no magnetometer). If you plan to use the magnetometer, keep it well away from the ESC, power distribution and large carbon runs—see the GPS mounting primer linked above.
Can I fit Walksnail HD to the Chupito?
Yes. You may need to trim the Walksnail cage’s bottom spar and use thin shims (Painless360 used 0.7mm 3D‑printed shims) to fit the camera snugly. Allow airflow and secure with a zip tie or small strap.
Where can I get the spar fitting tool he mentions?
Painless360 links his Thingiverse tool in his video description for making spar fitting easier; check the original video description on his channel for that Thingiverse link and related resources.
Want to see the original build video?
Watch Painless360’s full build on his YouTube channel for the step‑by‑step visuals and the promised maiden flight follow‑up.
This article was created from the video How I've build out (and modified!) my TBS Chupito.