TL;DR: This blog post takes an in-depth look at the Motion Sic Head Tracker Unit, which has the potential to revolutionize your DJI HD FPV experience. We provide a brief guide on its setup, features, and performance, as well as the challenges and solutions you might encounter. Join us as we dive into the world of head tracking and discover how it can enhance your FPV flying experience like never before.
The Basics of the Motion Sic Head Tracker Unit
The Motion Sic Head Tracker Unit is designed to enhance your FPV experience by sensing the orientation of your goggles and sending that information to your transmitter, which in turn moves the camera on the aircraft. It uses an accelerometer to sense tilt up and down, and a magnetometer (compass) to sense pan left and right. The head tracker functions by pretending to be another transmitter that your master transmitter treats as a buddy box.


Based off the Open-Source Head Tracker Project
The Head Tracker Project offers an affordable, open-source solution for RC enthusiasts with FPV headsets, providing an immersive experience by allowing the camera to follow head movements. Built using a single Arduino Nano 33 BLE, this easy-to-assemble project includes features like Bluetooth communication, calibration through an intuitive GUI, and USB joystick output. Elevate your FPV experience with the innovative and accessible Head Tracker Project.
Setting Up the Motion Sic Head Tracker Unit
To set up the head tracker, you'll need to configure your master transmitter to allow control of the channels that the head tracking servos are plugged into. The Motion Sic Head Tracker Unit features a clean and slick PC interface that allows for easy configuration of channel mapping, direction, gain, smoothing, and other settings. However, the setup process is not entirely plug-and-play, so some understanding of the system is necessary.

Potential Issues and Solutions
There are a few things to watch out for when setting up the Motion Sic Head Tracker Unit. Make sure not to plug the head tracker into both a LiPo and USB, as this can be disastrous. Additionally, ensure that other applications aren't stealing control of the COM port during setup. Lastly, take note that the video transmitter plastic mount may need adjustments depending on your airframe type.
Mounting the Unit onto a Canopy
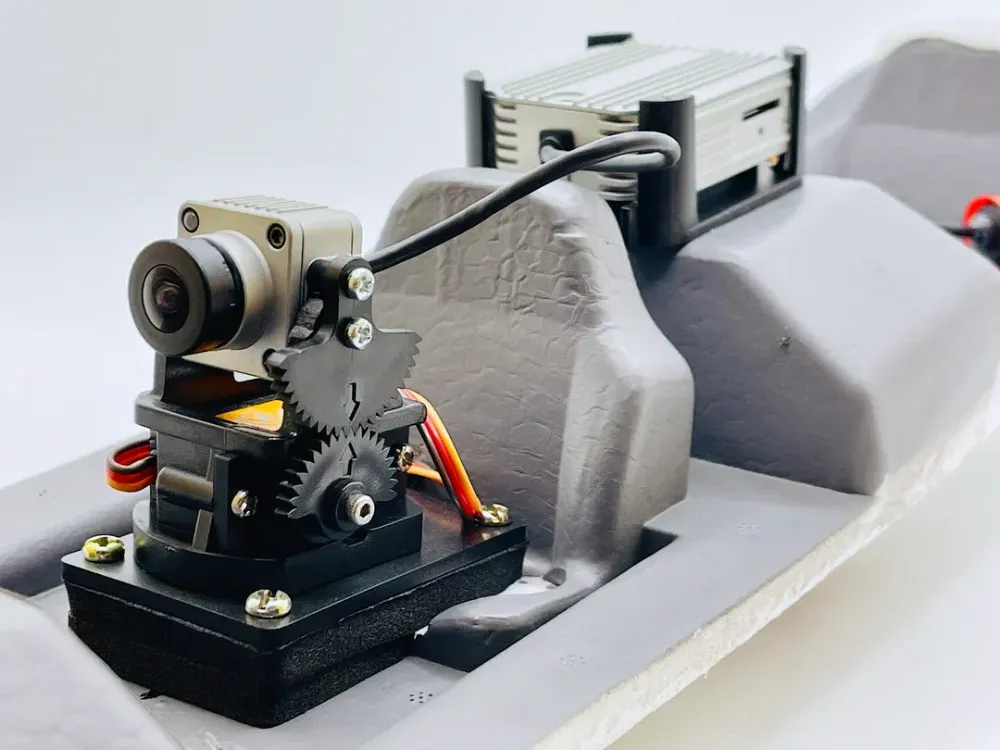
To finalize the setup, you will need to mount the head tracker onto a spare canopy. Remove all pilots and seats from the stock canopy, place a battery strap at the rear of the canopy for the video transmitter battery, and secure it with Ummagrip. Attach the camera mount, video transmitter, and route the pan and tilt servos through a hole in the canopy. Make sure to plug them into extensions from the appropriate channels on your receiver.
Taking Your First Flight
Once you have the head tracker set up and mounted, it's time to take your first flight. However, be prepared for potential issues during your initial flights, such as control checks, transmitter settings, or master override issues. It's important to diagnose and fix these issues before fully enjoying the head tracker experience.
The Immersive FPV Experience with Motion Sic Head Tracker Unit
With the head tracker unit properly set up, you'll be able to enjoy an immersive FPV experience like never before. Formation flying, combat, and even mock dogfights are all possible with the increased situational awareness provided by the head tracker. To get the most out of the system, consider using a long-range radio system and a flight controller with GPS and OSD to enhance your navigation capabilities.
With the Motion Sic Head Tracker Unit, you'll be able to take your FPV experience to new heights, offering a unique and engaging way to explore the world from the cockpit of your aircraft.
More Information
- Head Tracker - Head Tracker (gitbook.io)
- Tally Ho Head Tracker Unit (For the googgles if you dont want to build your own)
- MotionSic Badas Gimbal (again if you dont want to build your own)