Changing a TX16S MKII from Mode 2 to Mode 1 is not just a menu tick box. The radio needs both mechanical and software changes, or the sticks will feel wrong and the channels will be mapped wrong, which is a fine way to irritate oneself.
This guide covers the full process, from moving the throttle behaviour to the right gimbal through to recalibration and final checks.
TLDR: What you actually need to know
- The TX16S MKII needs two physical gimbal changes and one software mode change to convert from Mode 2 to Mode 1.
- You need a 1.5 mm hex driver and a Phillips screwdriver.
- The left gimbal must regain self centring, while the right gimbal must lose it and become the throttle stick.
- After the mechanical work, change the radio setting to Mode One in Radio Setup.
- Calibration matters. Move both gimbals slowly in a plus pattern, then include both pots and both sliders.
- Best for: pilots moving from Mode 2 to Mode 1 on a RadioMaster TX16S MKII who want the stick feel and channel behaviour to match properly.
- Avoid if: the only goal is to poke around menus and hope the springs sort themselves out. They will not.
How do you change a RadioMaster TX16S from Mode 2 to Mode 1?
The short answer is that the throttle function has to move from the left stick to the right stick, both physically and in software. On the TX16S MKII, that means adjusting the gimbal centring screws on the front, then tuning tension and ratchet screws on the rear, then setting the radio to Mode One in the system menu.
This is a proper conversion, not a cosmetic one. If only the software is changed, the sticks will still feel like Mode 2. If only the springs are changed, the radio logic will still think it is Mode 2. Neither outcome is helpful.
The practical takeaway is simple, do all three stages in order: front gimbal adjustment, rear stick feel adjustment, then software and calibration.
What tools are needed for the TX16S Mode 2 to Mode 1 conversion?
You only need two tools, a 1.5 mm hex driver and a Phillips screwdriver. Mercifully, no soldering iron, no disassembly marathon, and no pile of mystery screws rolling under the bench.
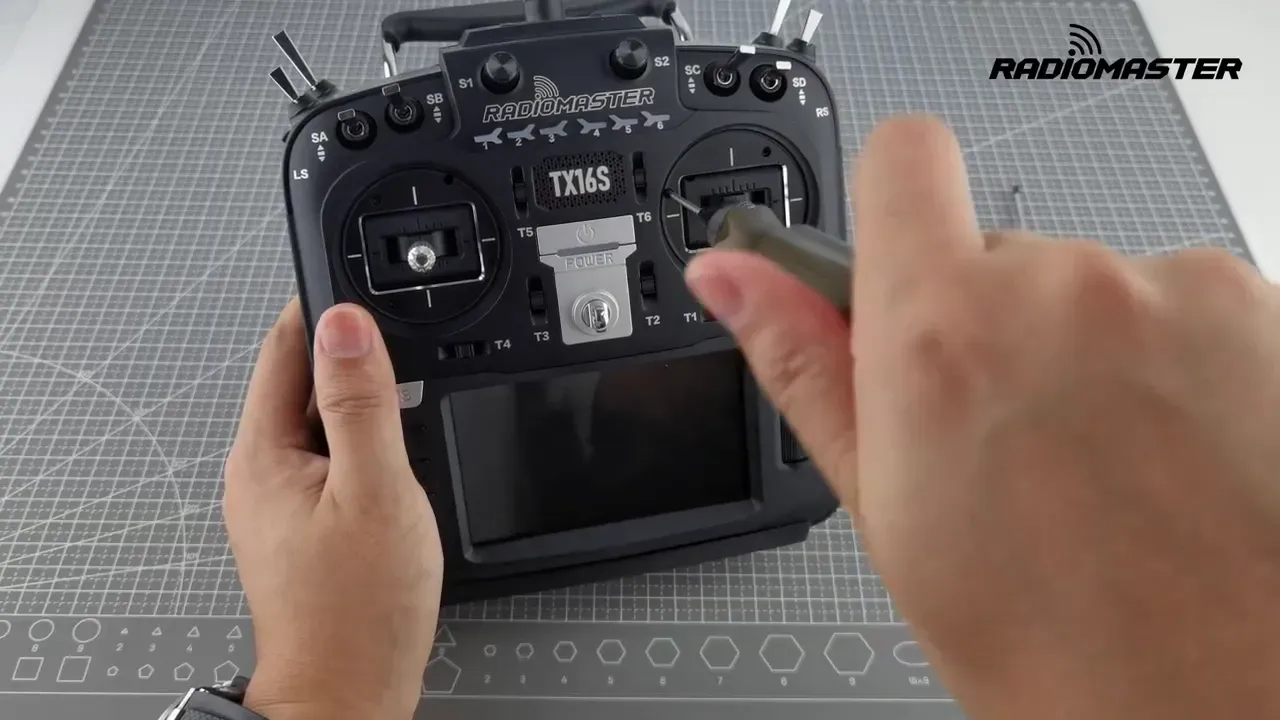
The hex driver is used for the front gimbal screws that control self centring on the vertical axis. The Phillips screwdriver is used on the rear access holes to tune stick tension and the throttle ratchet.
That also means this job is fairly quick, provided the screwdriver goes into the correct hole the first time, which is always the bit that turns a five minute tweak into a twenty minute grumble.
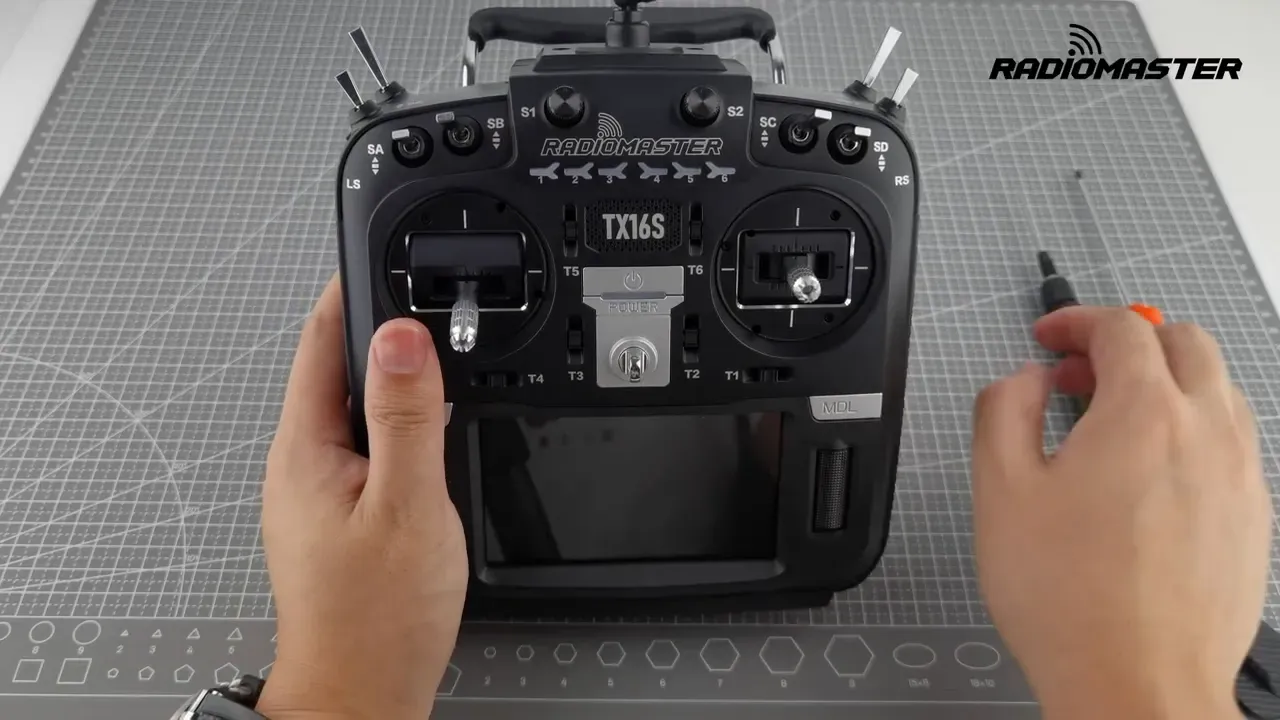
How do you move the throttle from the left stick to the right stick?
The throttle move starts at the front of the radio. The left gimbal needs its vertical axis centring restored, and the right gimbal needs that centring disabled so it can behave like a throttle.
On the left side, use the 1.5 mm hex driver and turn the relevant screw counterclockwise until the screw head sits level with the gimbal plate. At that point, the gimbal starts to self centre again. It may not feel perfect yet, but it should already be heading in the right direction.
On the right side, use the same hex driver and tighten the corresponding screw clockwise all the way down. That removes the self centring behaviour from the right vertical axis, which is exactly what a throttle stick needs.
This stage gets the basic spring behaviour swapped, but it is only the first half of the job. The fine tuning happens on the rear of the radio.
How do you adjust throttle tension and ratchet on the TX16S?
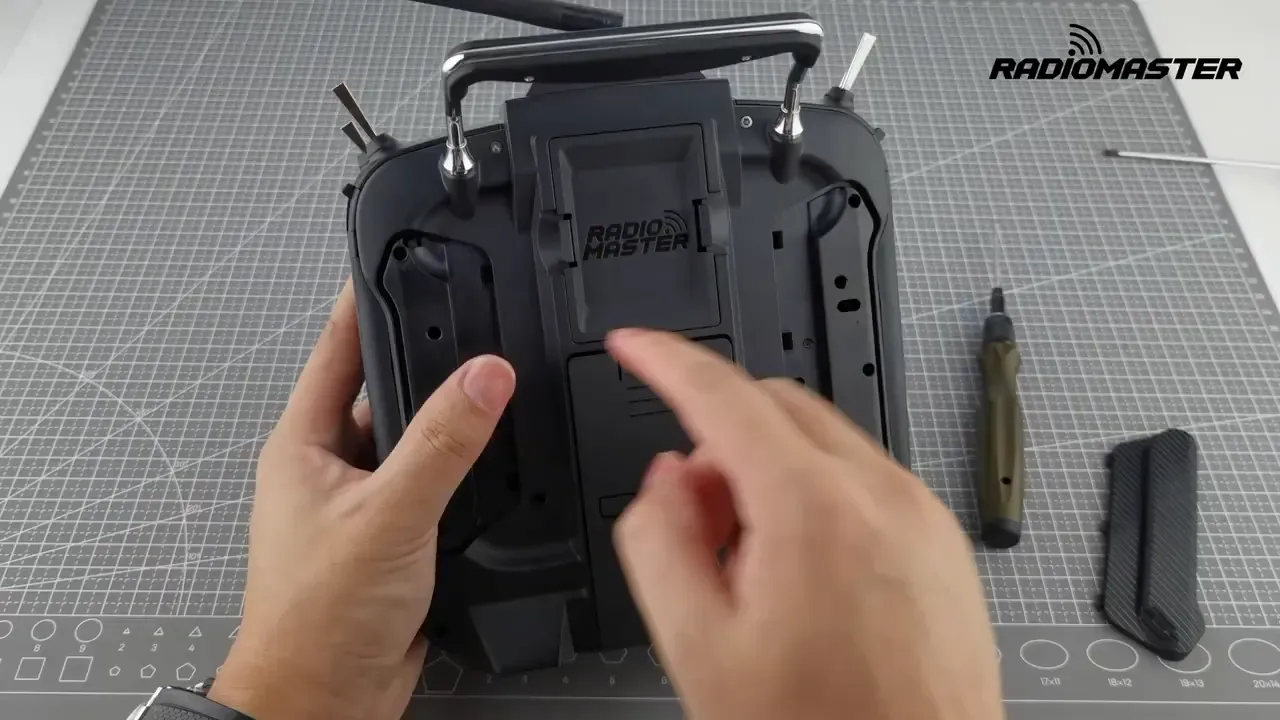
Throttle tension and ratchet are adjusted from the back of the radio, through two access holes behind the new throttle gimbal. In this conversion, that means the right side.

The inboard hole controls throttle tension. Turning clockwise increases stick tension, turning counterclockwise reduces it. The outboard hole controls the ratchet, so that is where the familiar stepped throttle feel is enabled or reduced.
The process is not about chasing a magic number. It is about adjusting both screws until the right stick feels like a proper throttle for the pilot using it. Some prefer a stronger ratchet, others want a smoother drag feel. RadioMaster leaves that choice in the user’s hands, which is civilised.
The practical takeaway is to adjust tension and ratchet together, not separately, until the right vertical stick behaves like a throttle and stays where it is put.
How do you improve self centring on the other stick after the mode change?
The newly self centring stick needs its old throttle resistance removed. After the conversion, that is the left vertical axis.
Using the access holes on the back, back off the inboard screw by turning it counterclockwise until there is no odd extra drag on that axis. If the ratchet had previously been active on that stick, release the outboard screw as well so the stepped feel disappears.
The goal is a clean spring return to centre, not a half-hearted compromise where the stick centres but still feels like it is scraping across a notched plate. If it still feels strange, more adjustment is needed.
Once this is done, the physical side of the Mode 2 to Mode 1 conversion is complete.
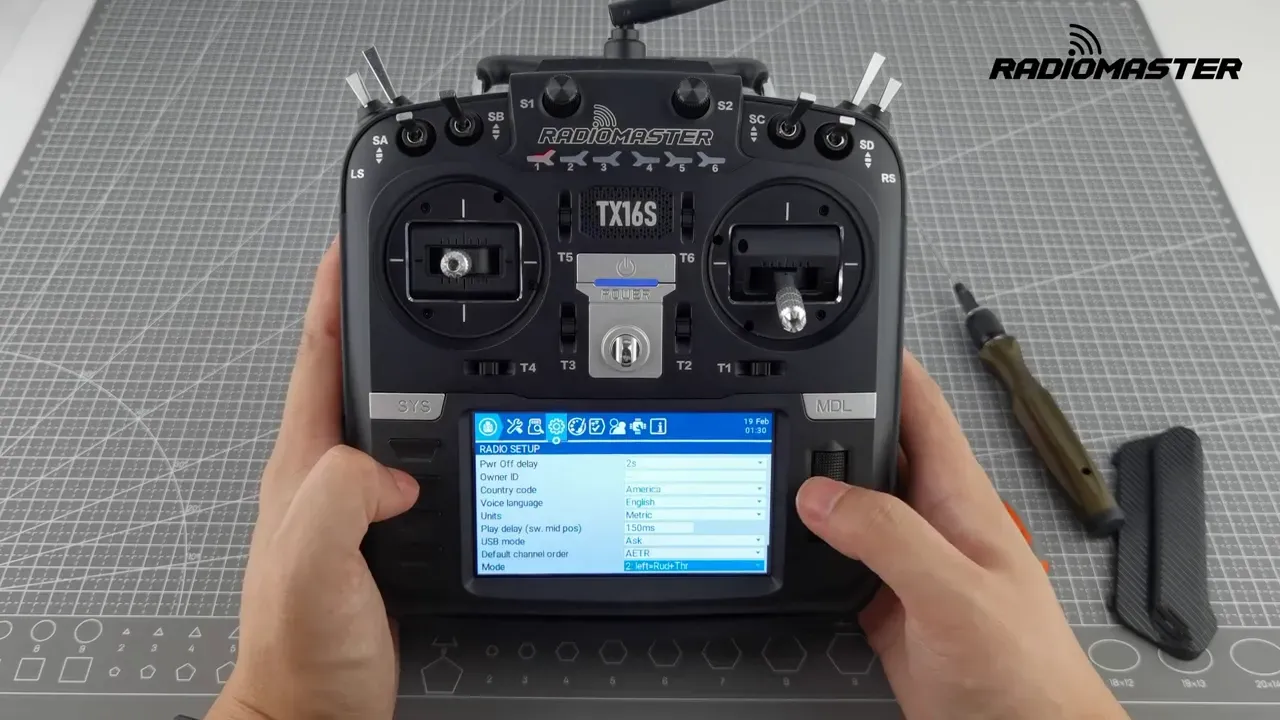
How do you change the TX16S software from Mode 2 to Mode 1?
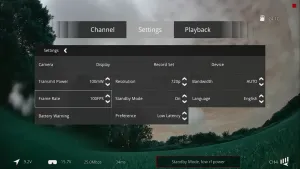
After the gimbals are physically swapped, the radio itself must be told to use Mode One. That setting is in the system menu under Radio Setup.
Power on the TX16S, clear the throttle warning, then press and hold the System button. Scroll across to Radio Setup and change the mode selection to Mode One.
This is the step that aligns the radio’s channel logic with the new stick layout. Skip it, and the hardware may feel right while the channel assignment remains wrong. That tends to end badly and quickly.
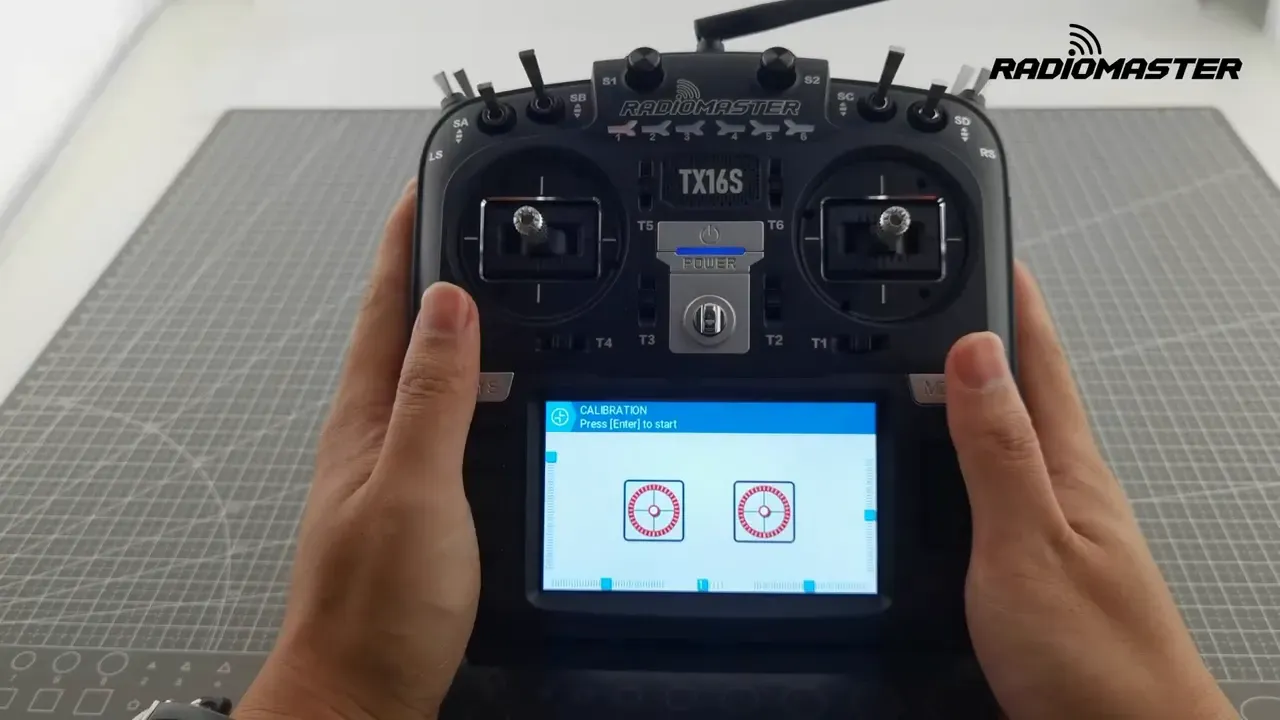
Why does TX16S gimbal calibration matter after changing modes?
Calibration matters because any adjustment to the gimbals can shift centres and endpoints. The radio needs to relearn where the sticks actually sit after the springs, tension, and ratchet are changed.
From the system menu, go to Hardware and enter calibration. Start with both gimbals centred, and centre both pots and sliders as prompted. Then move both gimbals slowly and deliberately in a plus pattern, repeating the motion a couple of times.
Do not ignore the pots and sliders. The calibration routine expects all of them. Rushing the process is also unhelpful. Slow and deliberate inputs give the radio clean endpoint data.
Anyone needing a broader refresher on stick endpoints and centre values may also want this guide on radio receiver calibration in Betaflight, because bad calibration habits tend to spread.
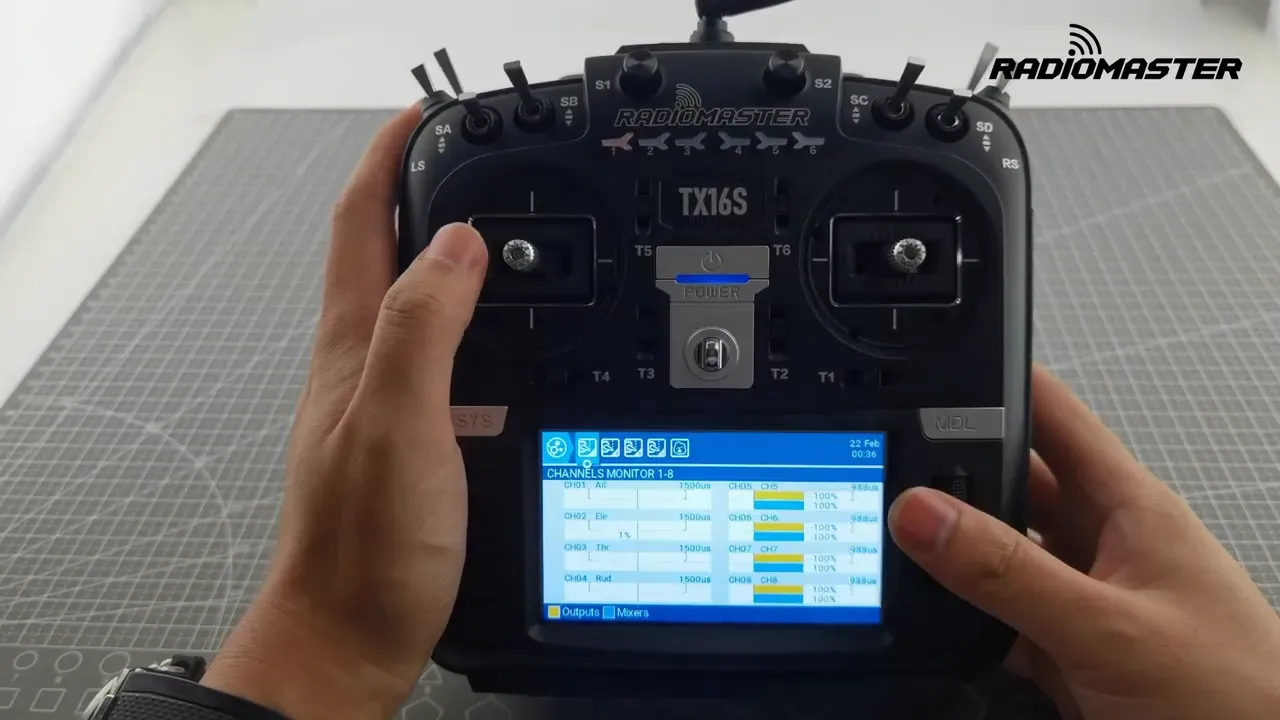
How do you check that the TX16S Mode 2 to Mode 1 conversion worked?
The proper check is the channel monitor. It shows stick movement graphically, which makes it much easier to spot wrong centres or missing endpoints.
Exit calibration, return to the main screen, and open the channel monitor. Move the sticks and confirm that the bars respond correctly, with sensible midpoints and full travel at the ends.
This is the final sanity check before using the radio with a model. If the centres or endpoints look wrong, recalibrate before doing anything else. Flying with a radio that thinks halfway is centre-ish is a poor life choice.
If channel mapping or ExpressLRS behaviour still looks odd after the mode change, this troubleshooting guide on common ExpressLRS errors and fixes may save some time.
What can go wrong when changing TX16S modes?
The usual failure is only doing half the job. A menu change without the mechanical adjustment leaves the wrong stick self centring. A mechanical swap without the menu change leaves the radio logic wrong.
Another common issue is forgetting calibration. The sticks may feel fine, but the radio can still report poor centre points or endpoints until calibration is run again. The channel monitor is the place to catch that before it causes confusion later.
A third problem is over adjusting the rear screws without checking feel as you go. Too much tension or a ratchet left active on the self centring stick makes the transmitter feel wrong even if the mode change is technically complete.
The practical takeaway is to verify each stage before moving on. Change the spring behaviour, adjust the rear feel, set Mode One in software, calibrate, then confirm on the monitor.
Is it worth switching a TX16S MKII to Mode 1 instead of buying another radio?
If the TX16S already fits the pilot and only the control mode is wrong, yes, changing it makes sense. The process is short, needs only two tools, and the radio has built in adjustments for exactly this job.
There is no sign here of extra parts, replacement gimbals, or awkward internal teardown. That makes the conversion far cheaper and less annoying than replacing a perfectly good transmitter over stick preference alone.
For anyone still choosing a radio rather than converting one, our review of the RadioMaster GX12 ExpressLRS may help sort out whether a different form factor makes more sense.
FAQ
Can the TX16S Mode 2 to Mode 1 change be done without opening the radio?
Yes, based on the supplied procedure, the conversion is done through front and rear access points. No full teardown is shown or described. The hand grips were removed for demonstration, but the core adjustments use external access holes and front screws.
Does changing the mode in software also change the stick feel?
No. The software changes channel assignment and mode behaviour, but the stick feel still depends on the spring, tension, and ratchet settings. Both hardware and software need to match.
Why is the throttle warning still shown when powering on?
The radio still checks throttle position at startup. During the process, that warning is simply bypassed so the system menu can be reached. After conversion and calibration, it is worth confirming the throttle axis behaves as expected.
How slow should the sticks be moved during calibration?
The sticks should be moved slowly and deliberately. The calibration routine shown uses repeated plus shaped motions rather than frantic circling. The idea is to give the radio clean, full range data.
What should the channel monitor show after a successful TX16S mode conversion?
It should show proper stick response with sensible centre values and full travel at both ends. The important part is that the newly assigned throttle and self centring axes behave correctly. If the bars look off centre or do not reach expected limits, recalibration is needed.
Can the throttle ratchet be disabled completely on the TX16S?
Yes. The rear outboard access hole controls the ratchet adjustment. Releasing that screw disables the ratchet feel on the relevant stick.
Is any firmware version required for this TX16S MKII mode change?
Not stated in the video. The process shown uses the system menu and hardware adjustments available on the TX16S MKII, but no firmware version is named.
This article was based from the video RadioMaster TX16s MKII - How to change modes (Mode 2 to Mode 1)