Switching a TX16S MK3 from Mode 2 to Mode 1 is not just a menu tap. The sticks need mechanical changes first, or the radio ends up with the wrong centring and throttle feel, which is the sort of detail that ruins an otherwise good afternoon.
TLDR: What you actually need to know
- The TX16S MK3 mode change has two parts, mechanical gimbal adjustment and a software mode setting.
- You need a 1.5 mm hex wrench for the main adjustments, and a screwdriver if fine throttle damping adjustment is needed inside the shoulder module.
- To go from Mode 2 to Mode 1, the left stick must gain centring, and the right stick must lose centring and become the throttle stick.
- Rear grip removal is needed to reach the basic damping adjustment on the back of the radio.
- After the hardware work, the radio menu must be set to Mode 1 in Radio Settings, or the stick mechanics and software mapping will disagree with each other.
- Best for: pilots who already know they prefer Mode 1 and want the TX16S MK3 configured properly, not half-converted.
- Avoid if: the plan is to change only the software mode and ignore the stick hardware, because that produces a radio with the wrong spring and throttle behaviour.
What does changing a TX16S MK3 from Mode 2 to Mode 1 actually involve?
It involves moving the throttle behaviour from the left stick to the right stick, then telling the radio firmware about it. In Mode 2, the left stick is the throttle stick and does not self-centre on that axis. In Mode 1, that job moves to the right stick.
That means one stick must have its centring restored, while the other must have centring removed and throttle resistance set. Then the radio menu needs to match the new stick layout. Skipping either half is a neat way to create confusion.
The source material shows this as a deliberate workshop-style process rather than a quick setting buried in EdgeTX. Fair enough. A throttle stick that springs back to centre is not much use to anybody.
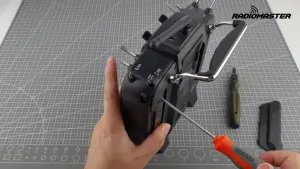
What tools are needed for the TX16S MK3 mode switch?
A 1.5 mm hex wrench is the main tool. It is used for the visible gimbal and damping adjustments shown during the procedure.

For finer throttle damping adjustment, a screwdriver is also used after removing the shoulder module. That extra step is only needed if the default damping feel is not right and needs trimming.
The practical takeaway is simple. Do not start with a random Allen key from the bottom of the field box and hope for the best. Use the specified size, and keep a screwdriver ready if fine tuning becomes necessary.
How do you make the left stick self-centre on a TX16S MK3?
To convert from Mode 2 to Mode 1, the left stick must regain centring on the throttle axis. The method shown is to turn the relevant front screw counterclockwise until throttle centring is enabled.
That changes the stick from throttle behaviour to a spring-centred control. After that, the rear grip is removed so the damping can be reduced to minimum from the back of the radio.
The process then checks whether any damping remains by moving the stick and feeling for drag. If needed, the grip goes back on once the adjustment is done.
This is the part that matters most for a clean conversion. If the left stick still feels like a throttle after the change, the radio is not really in Mode 1, no matter what the menu later claims.
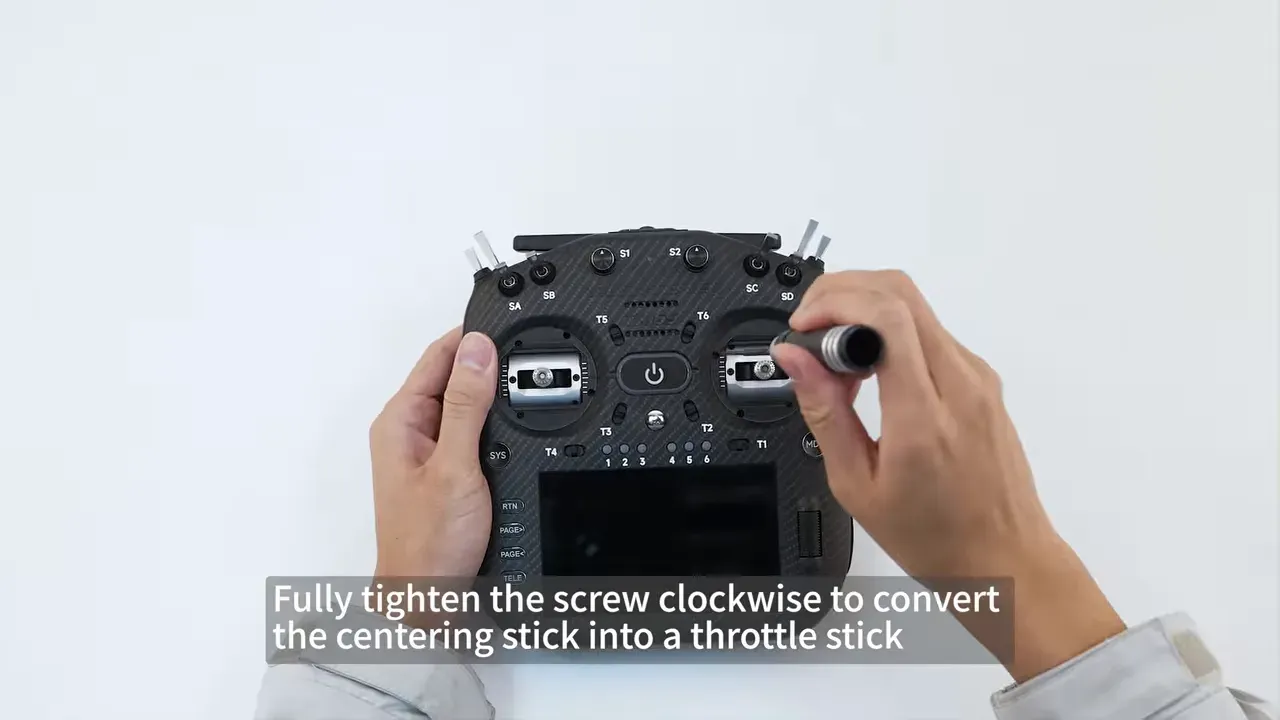
How do you turn the right stick into the throttle stick on a TX16S MK3?
The right stick becomes the throttle stick by increasing or confirming its spring setup first, then locking out centring on the throttle axis. The procedure shown starts by testing centring force and adjusting spring tension to preference.
Once the spring feel is right, the centring screw is tightened clockwise fully so that stick becomes the non-centring throttle axis. After that, the damping feel is checked by moving the stick and confirming the resistance is sensible.
If the default damping is acceptable, the job stays simple. If not, there is a more fiddly route involving the shoulder module and an internal screw.
Anyone building or maintaining radios long term will recognise this pattern. The menu decides channel logic, but the hardware decides whether the sticks feel right in the hand. Both matter.
For related setup work once the radio side is sorted, receiver calibration in Betaflight is worth checking so stick endpoints and centres are behaving properly on the aircraft as well.
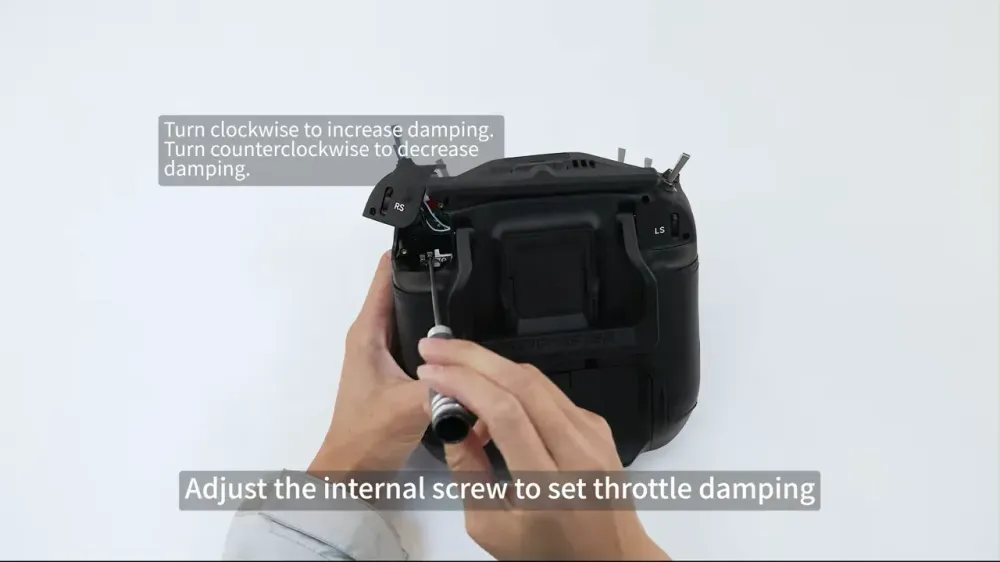
How do you adjust TX16S MK3 throttle damping if the stick feel is wrong?
If the throttle damping feels off, the TX16S MK3 allows a finer internal adjustment. The process shown removes the corresponding shoulder module from the back of the radio with a screwdriver.
Inside that module, an internal screw controls throttle damping. Turning it one way increases damping, and the other way reduces it. The guide shows repeated checking of stick feel after each change rather than cranking blindly and hoping muscle memory will forgive it.
Once the feel is correct, the shoulder module is reinstalled and the stick is tested again from the front.

This is a useful detail because it shows the radio has more adjustment range than the obvious external controls suggest. It also means a rough throttle feel is not automatically a factory defect, sometimes it just needs setting properly.
How do you set the TX16S MK3 software to Mode 1?
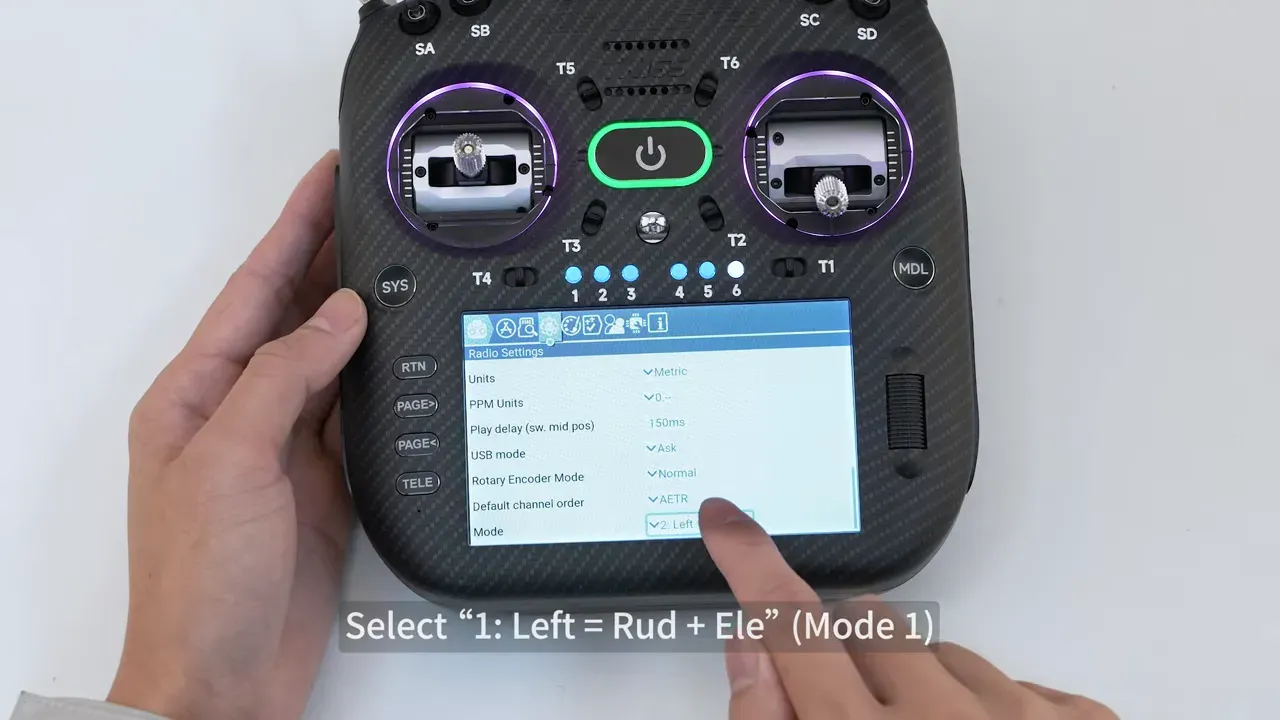
After the mechanical work, the radio must be switched to Mode 1 in software. The process shown powers on the radio, opens the system menu with the SYS button, enters Radio Settings, scrolls to the Mode option, and selects the Mode 1 layout.
The on-screen option shown maps the left stick to rudder and elevator, which matches Mode 1. After that, returning to the main screen completes the software side of the change.
If the radio mechanics are changed but this menu is left in Mode 2, channel behaviour will be wrong. If the menu is changed without the mechanical work, the throttle stick will still feel wrong. The radio is not being difficult here, it is just insisting on basic consistency.
How do you check that the TX16S MK3 mode switch worked properly?
The final check is to confirm both joysticks behave correctly before and after power-up. The source material shows testing stick movement by hand, then powering on the radio and verifying the configuration in the menus.
The practical signs are straightforward:
- The left stick should self-centre on the converted axis.
- The right stick should behave like the throttle stick and hold position with damping.
- The radio menu should report Mode 1, not the old layout.
If any one of those is wrong, the conversion is incomplete. Go back to the matching step rather than trying to fly around a setup mistake. That rarely ends with dignity.
If an aircraft behaves strangely after a radio change, it is also worth checking the usual basics such as mapping, props, and motor direction. This guide on troubleshooting drone flip-outs covers the common gotchas.
Is switching the TX16S MK3 from Mode 2 to Mode 1 worth doing?
Yes, if the pilot already flies Mode 1 and wants the radio to match properly. The procedure is short, methodical, and clearly designed for a full mechanical and software conversion rather than a cosmetic menu tweak.
There is no broader argument here about which mode is superior. Not stated in the video. The value is that the TX16S MK3 can be configured correctly without replacing gimbals or resorting to bodges.
The takeaway is simple. If Mode 1 is the target, do the whole conversion once and do it properly.
FAQ
Can the TX16S MK3 be changed from Mode 2 to Mode 1 without opening the case?
No, not fully. The software mode can be changed in the menu, but the stick centring and damping adjustments require access to the radio hardware. Fine damping adjustment also needs shoulder module removal.
Which stick becomes throttle in TX16S MK3 Mode 1?
In Mode 1, the right stick becomes the throttle stick. The left stick regains centring, while the right stick is adjusted to hold position with damping instead of springing back.
Why does the TX16S MK3 still feel like Mode 2 after changing the menu?
Because the mechanical conversion has not been done yet. The menu changes channel mapping, but it does not magically move springs and friction hardware inside the gimbals. Both parts must match.
How to fix TX16S MK3 throttle stick damping that feels too loose or too stiff?
Use the damping adjustment shown on the rear of the radio first. If that is not enough, remove the corresponding shoulder module and adjust the internal damping screw. Make small changes and test the stick feel each time.
What tool size is needed for the TX16S MK3 mode switch?
The procedure specifies a 1.5 mm hex wrench for all main adjustments. A screwdriver is also used for shoulder module removal during fine damping adjustment.
Does changing the TX16S MK3 to Mode 1 affect receiver setup?
It can, depending on how the model and flight controller were configured before. The video only covers the radio conversion, not model remapping or flight controller changes. It is sensible to check channel order and stick response after the switch.
Key specs and claims mentioned
- Product shown: RadioMaster TX16S MK3 / TX16S MK3 MAX
- Conversion covered: Mode 2 to Mode 1
- Main tool: 1.5 mm hex wrench
- Additional tool for fine damping adjustment: screwdriver
- Software path shown: SYS button to Radio Settings to Mode
- Mode selected in menu: Mode 1
- Hardware tasks shown: centring adjustment, spring tension adjustment, damping adjustment, rear grip removal, shoulder module removal and reinstall